It’s September and the seasons are changing everywhere. Here in Australia we see the magpies collecting material for their spring nests while our friends in the US, Canada and the UK will soon see the leaves fall. Just as the seasons change, SortScape constantly changes and evolves to make your life easier and your business run smoother. Below are some of the improvements you may have noticed since our last newsletter.
Visit timer
SortScape has always been a convenient way for your staff to log their time. Our new visit timer feature makes it even easier for staff to log their time by removing the need for manual entry. When employees arrive onsite, they simply open a visit from the iOS or Android app and click the “start timer” button.
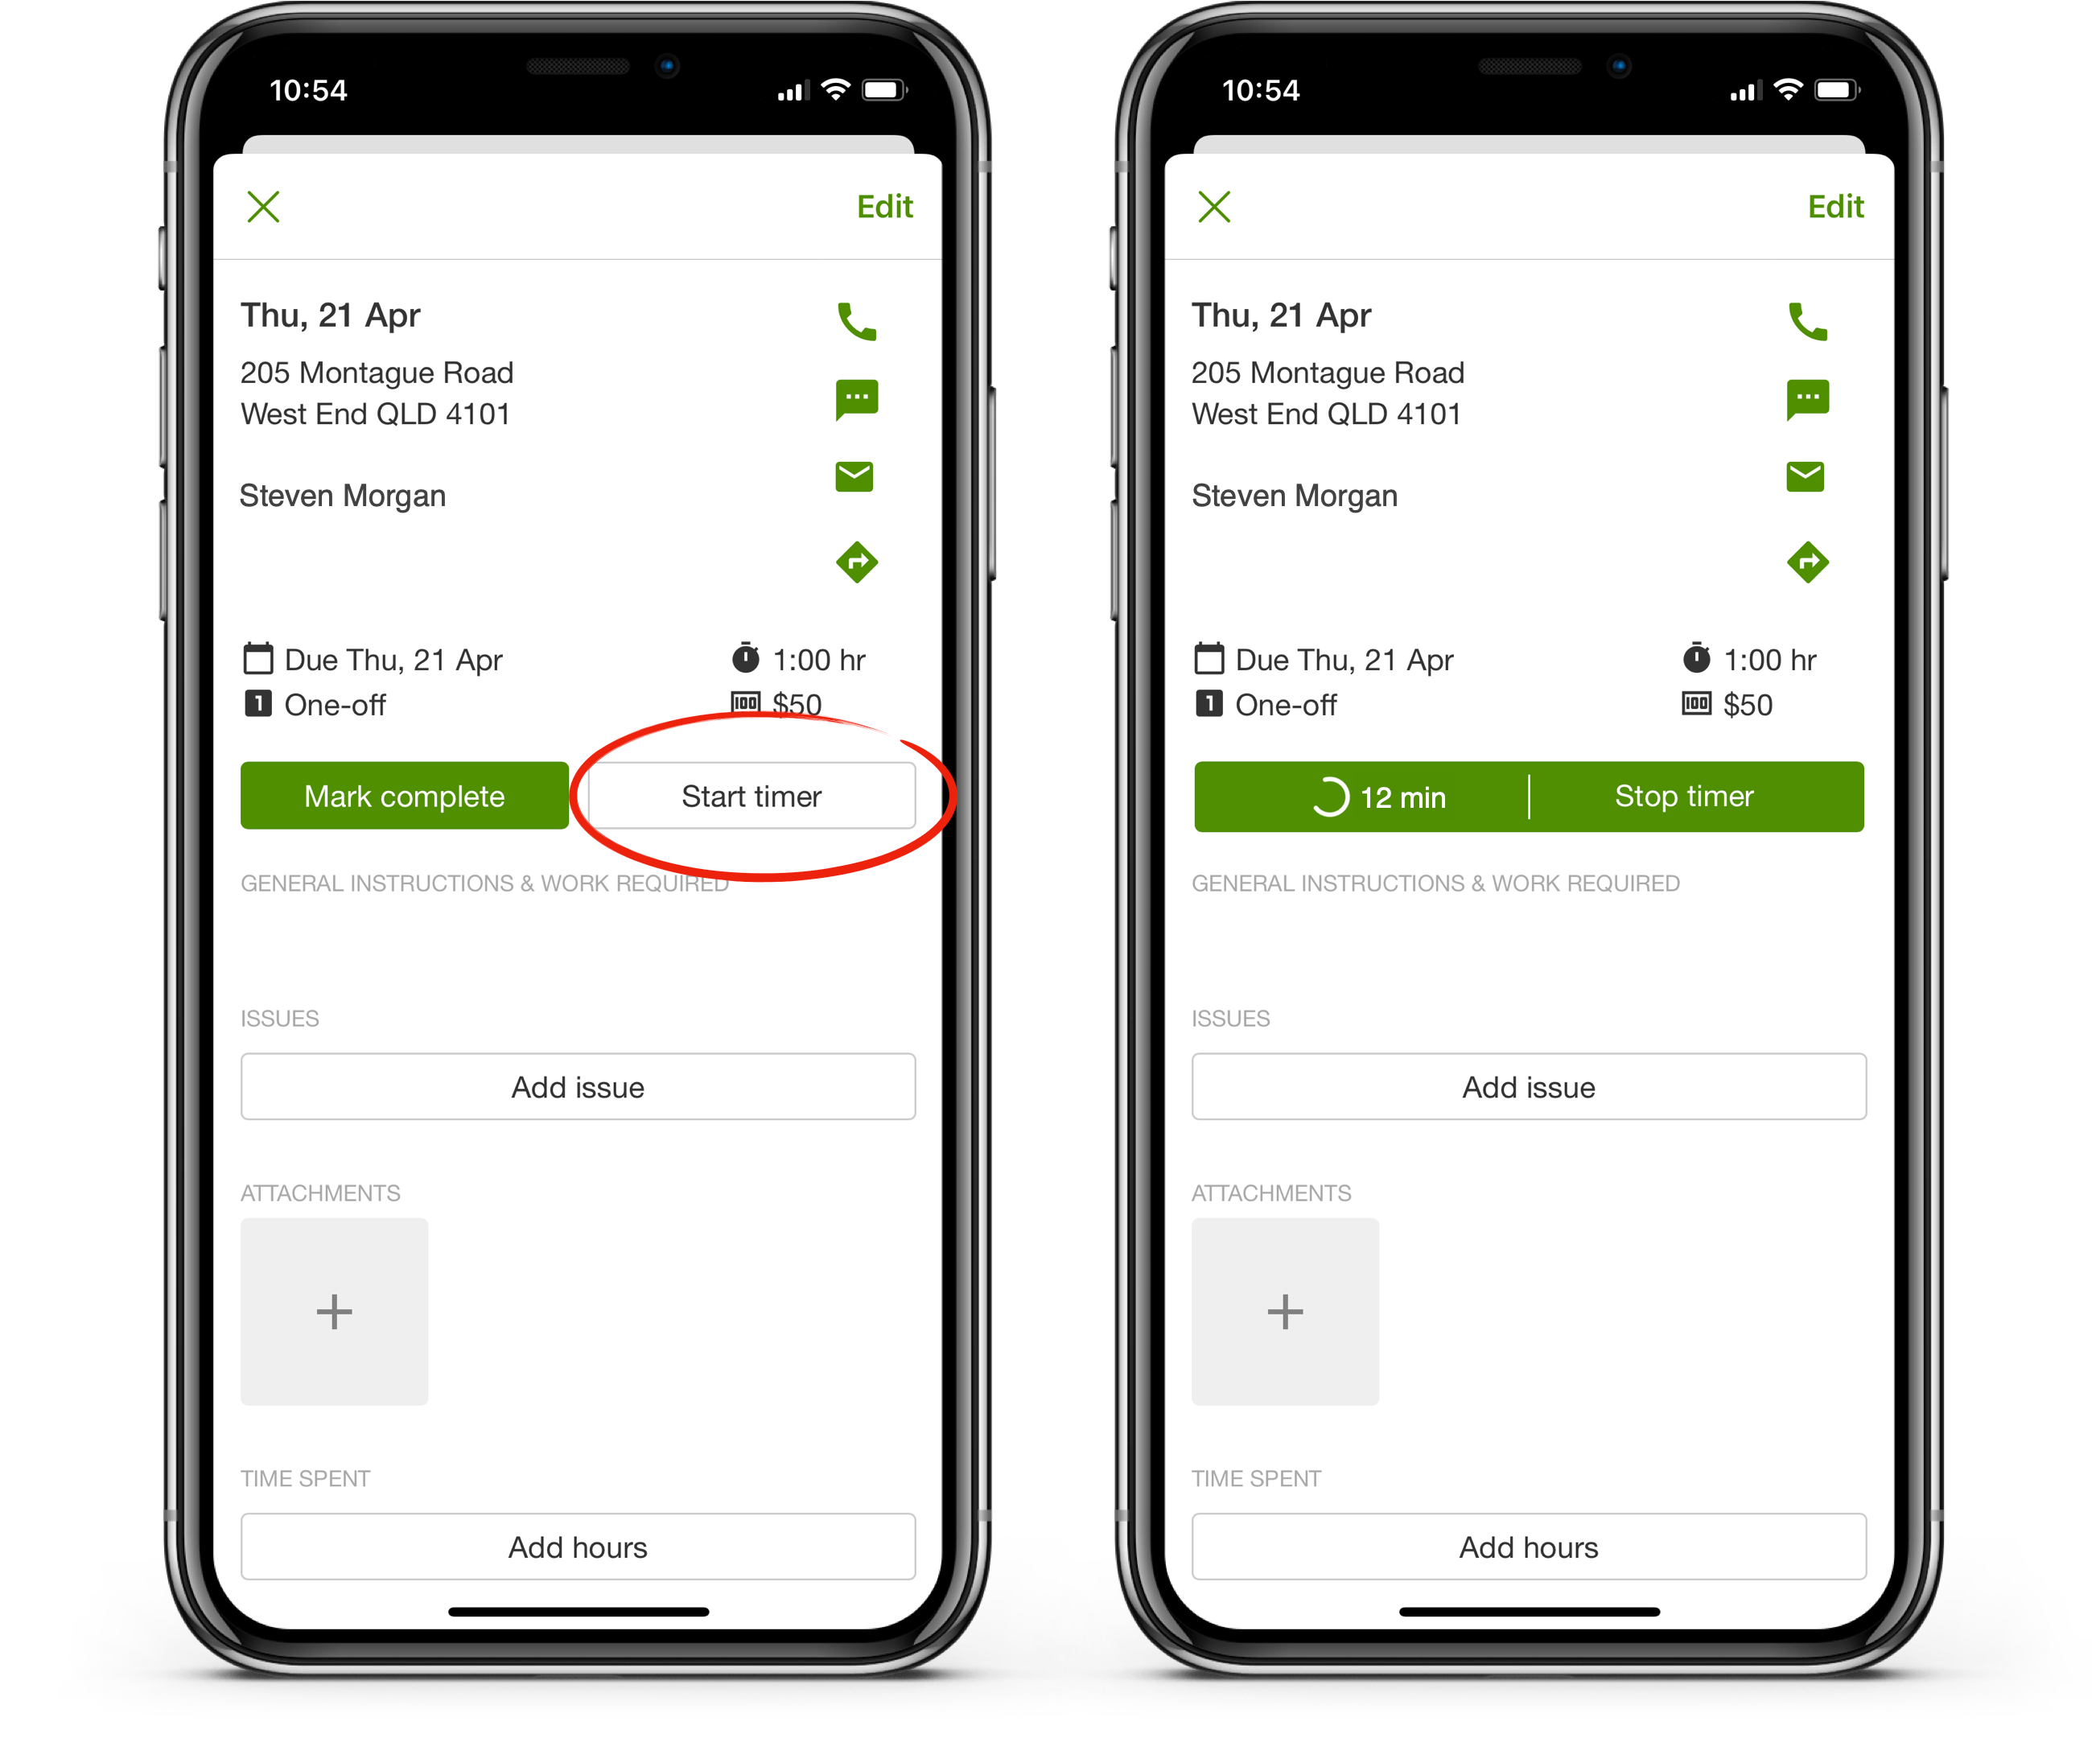
When the visit is done, they stop the timer and their hours are automatically added. (Marking a visit complete will also end the timer.) Once the timer has been stopped, you can even edit or delete the hours from the visit’s “Time Spent” section.
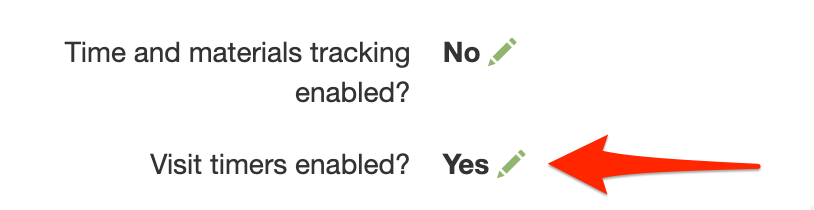
Note that a user must be logged into the SortScape iOS app or Android app to start a timer. Also, the feature must first be enabled for your site. To enable this feature, go to the “time and materials” admin setting screen and check the “Visit timers enabled?” box as shown below.
Major improvements to mobile
You’re frequently in the field with staff and customers so we want to help you do more with SortScape’s mobile app. Recently we added a few mobile features we think you’ll like.
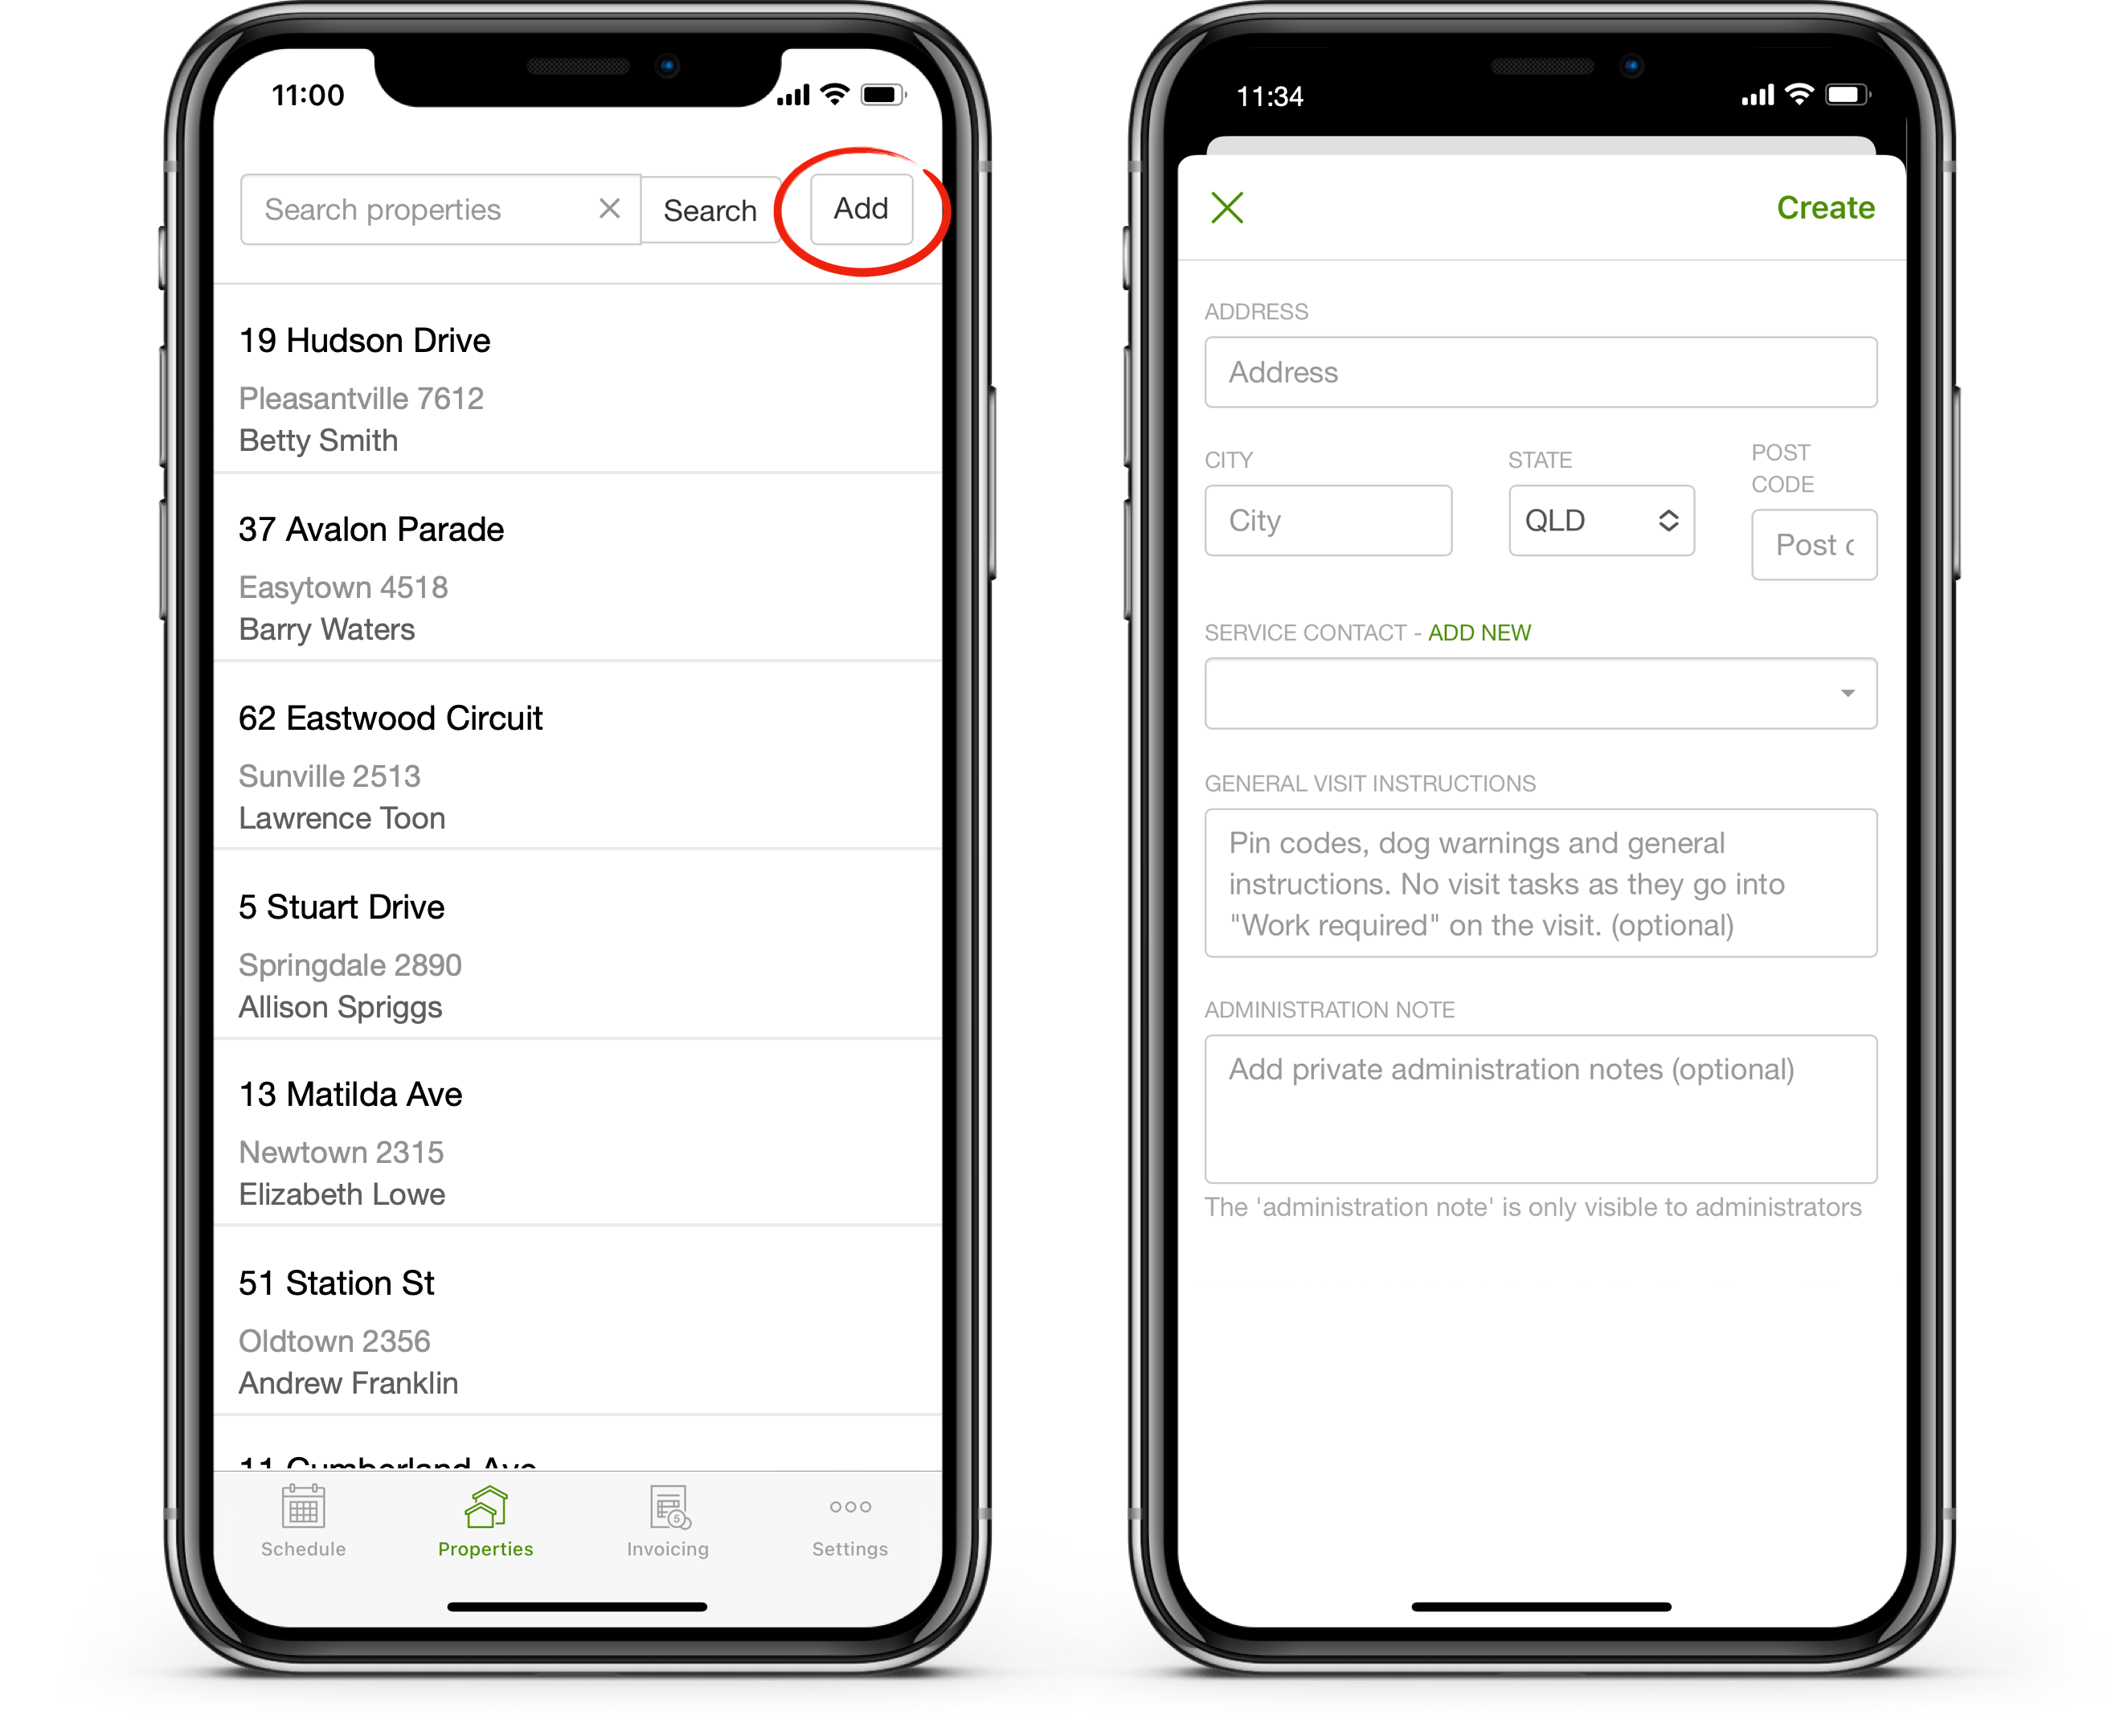
First of all, you can now add properties directly to the SortScape mobile app without having to first schedule a visit. To do this, just go to the “properties” screen and click the “add” button in the upper right hand corner of the screen.
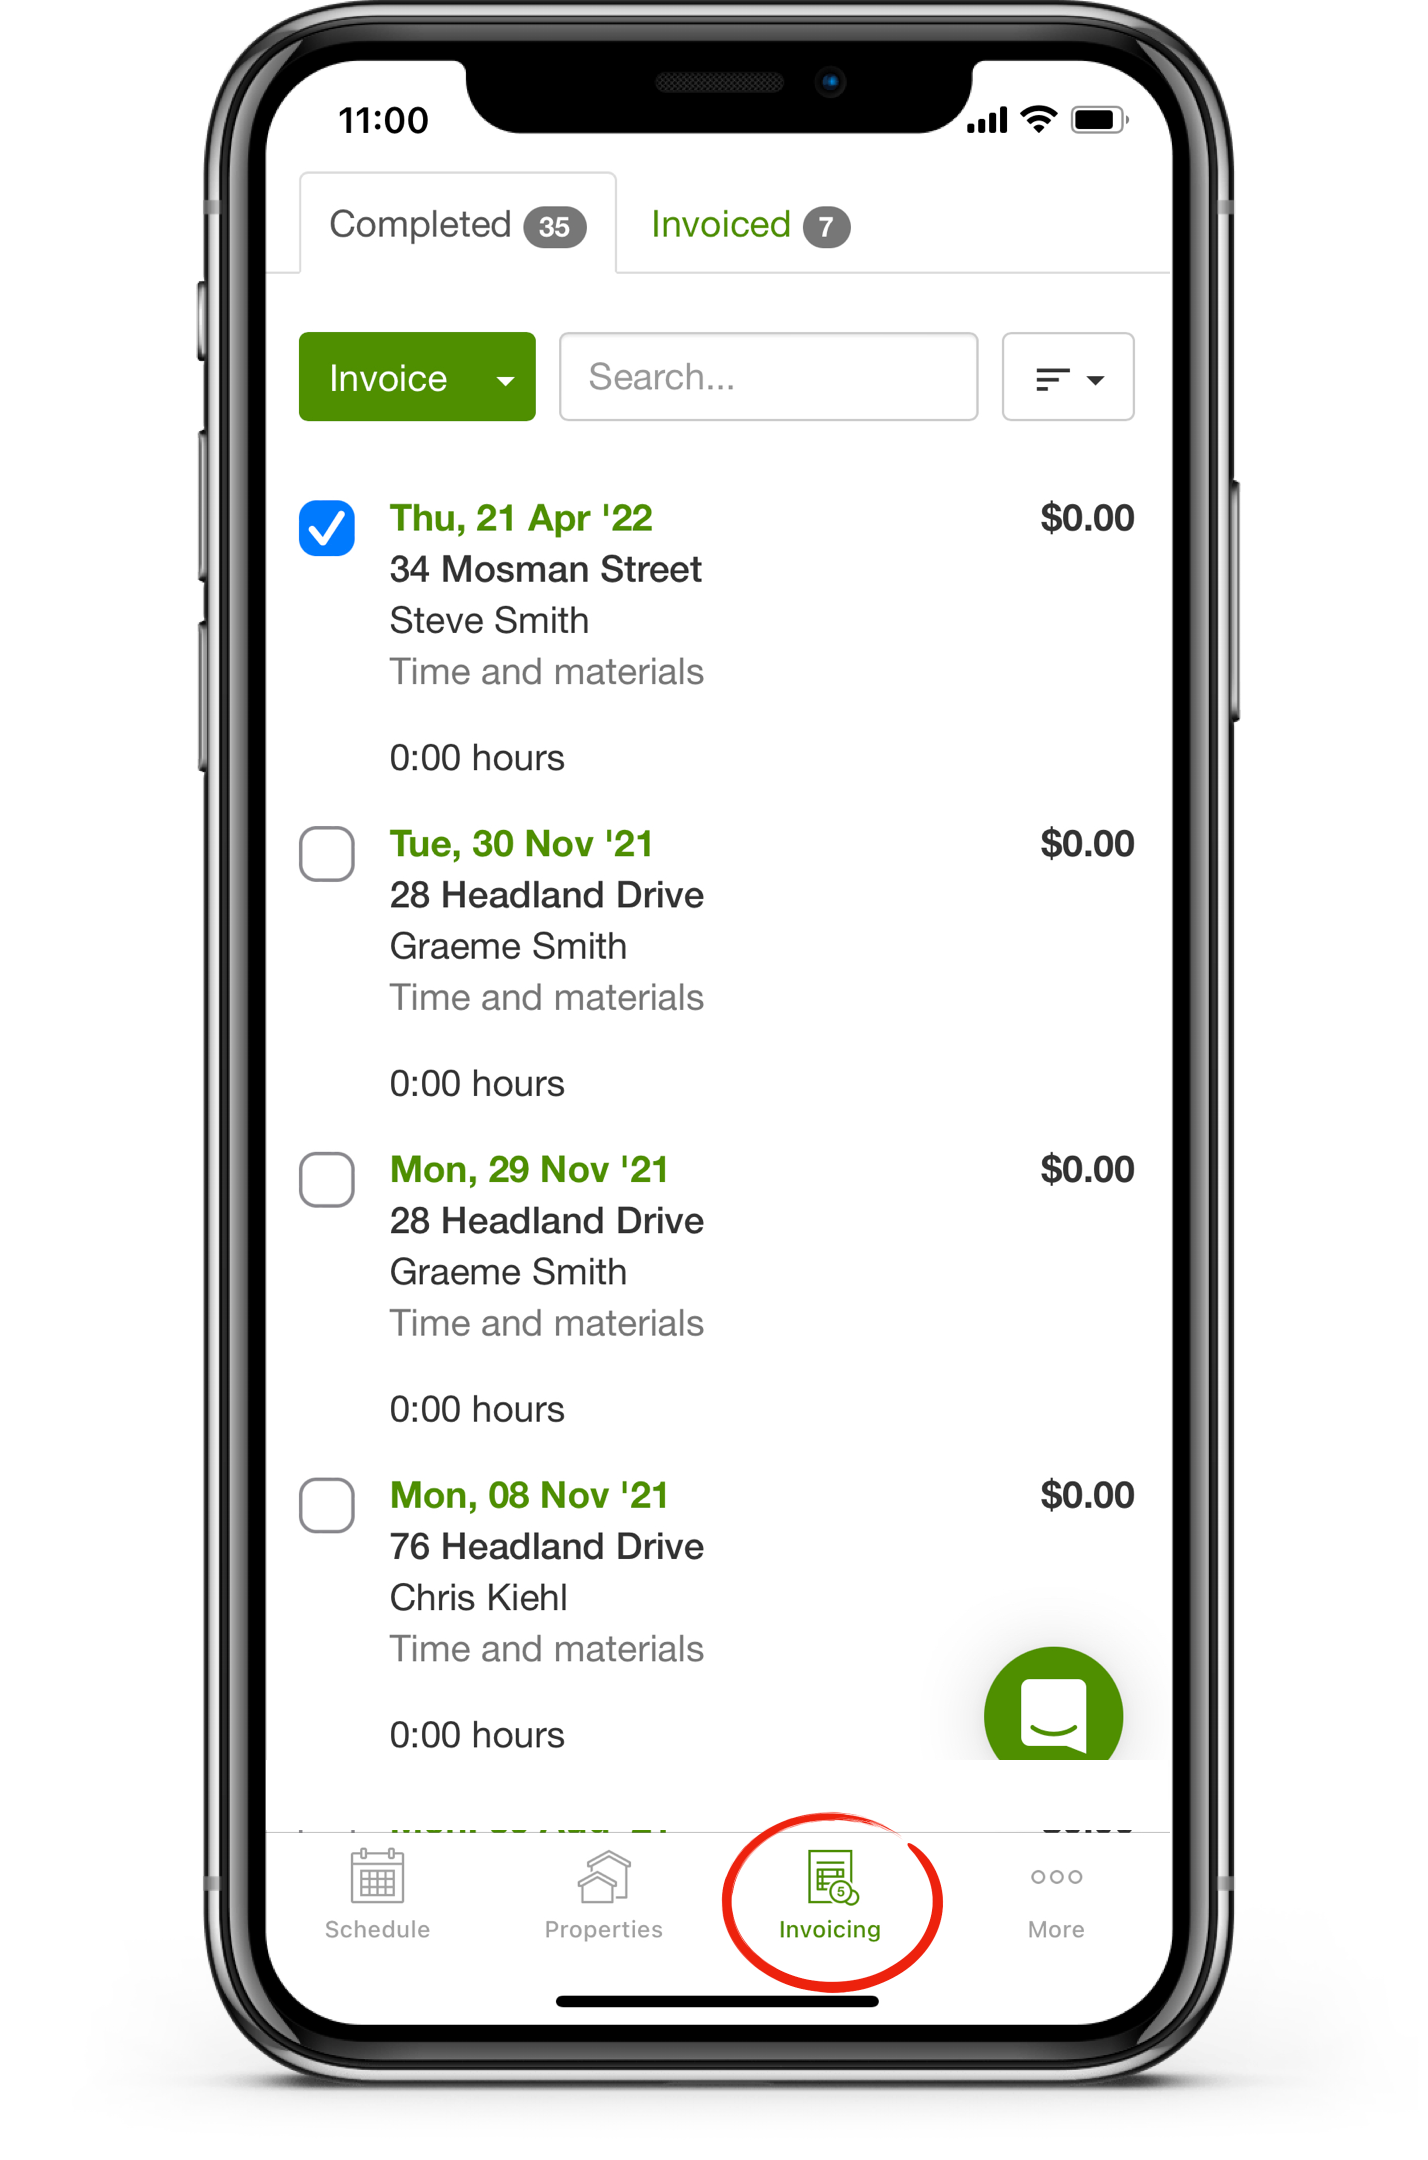
Secondly, administrators can now access the entire “Invoicing” screen from mobile. From there they can mark completed visits as invoiced or, if they are connected to Xero or QuickBooks Online, they can create invoices. And all the nifty searching and sorting features we told you about in our last newsletter are available here too so you can create a single invoice for multiple visits across a given property or contact. ![]() Try it and let us know what you think!
Try it and let us know what you think!
Add attachments to emails and invoices
One of the great things about SortScape is how easy it makes customer messaging and invoicing. In the click of a button, you can send a pre-defined email to a customer about an upcoming visit or create an invoice in Xero or QuickBooks Online. We’ve made these experiences even more useful because now you can share files and images with your customers when you email or invoice them.
When you click to send an email from a visit, you will see the attachments for that visit listed in the “include attachments” section at the bottom. Simply select one or more attachments and they will get included in the email.
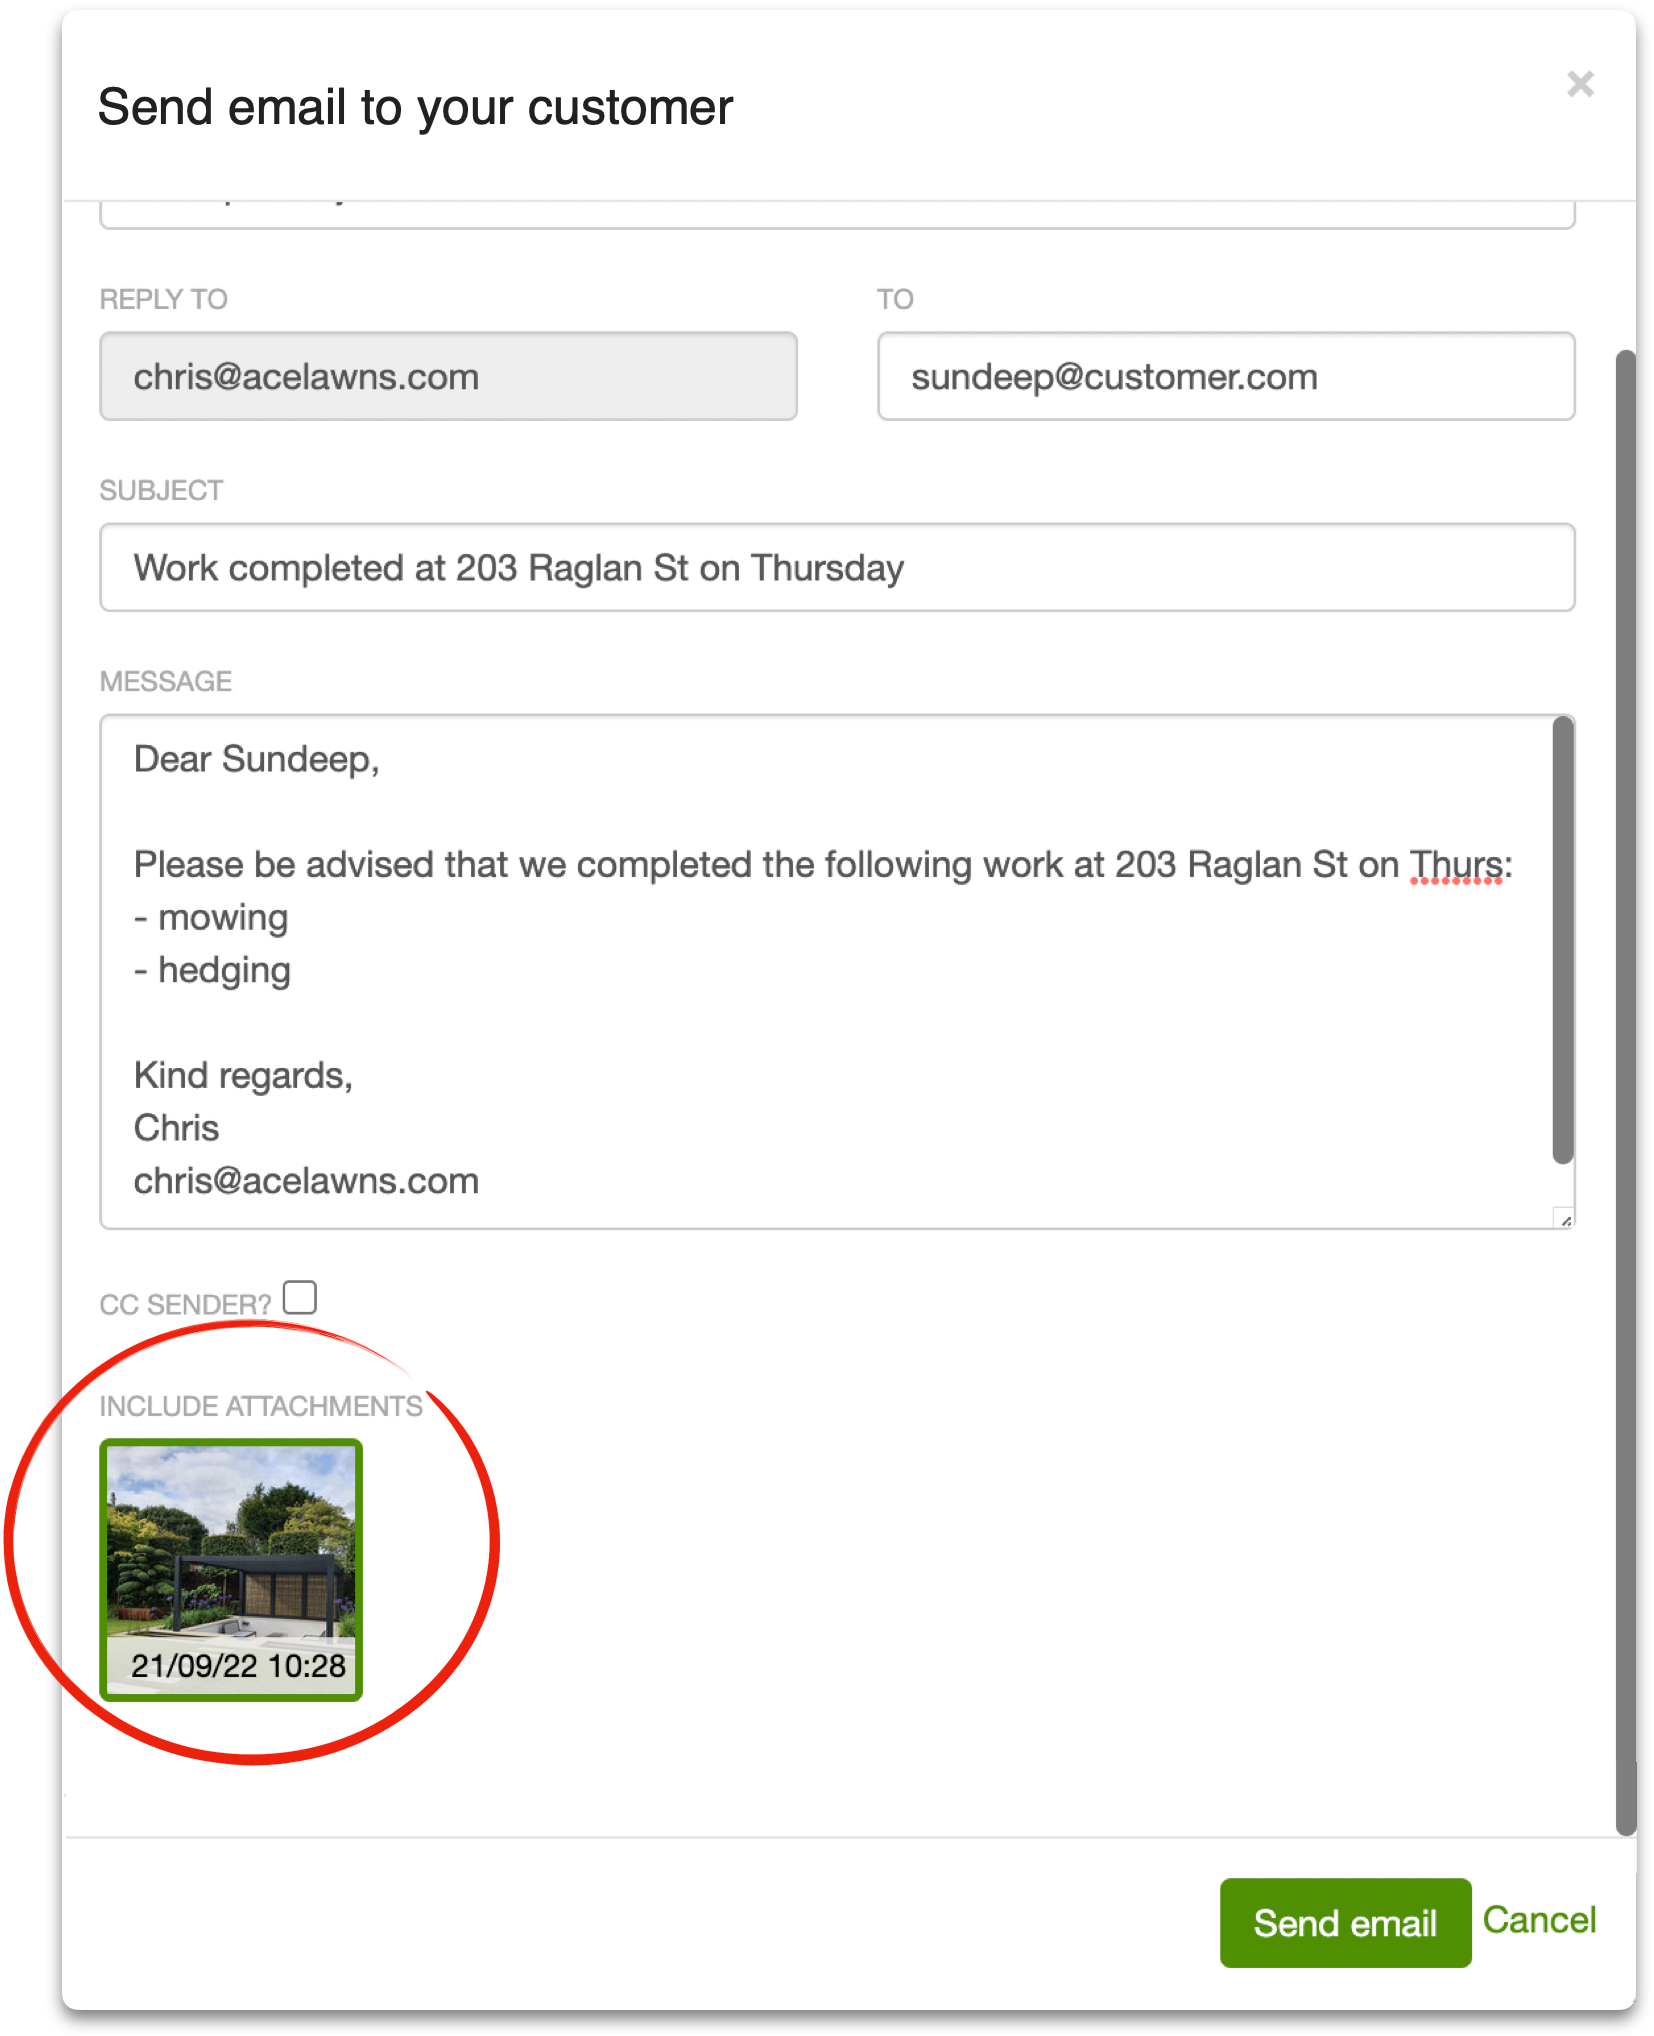
Similarly, when you create an invoice you can also select one or more attachments. These attachments will get added to the invoice so that they can be shared with the customer!
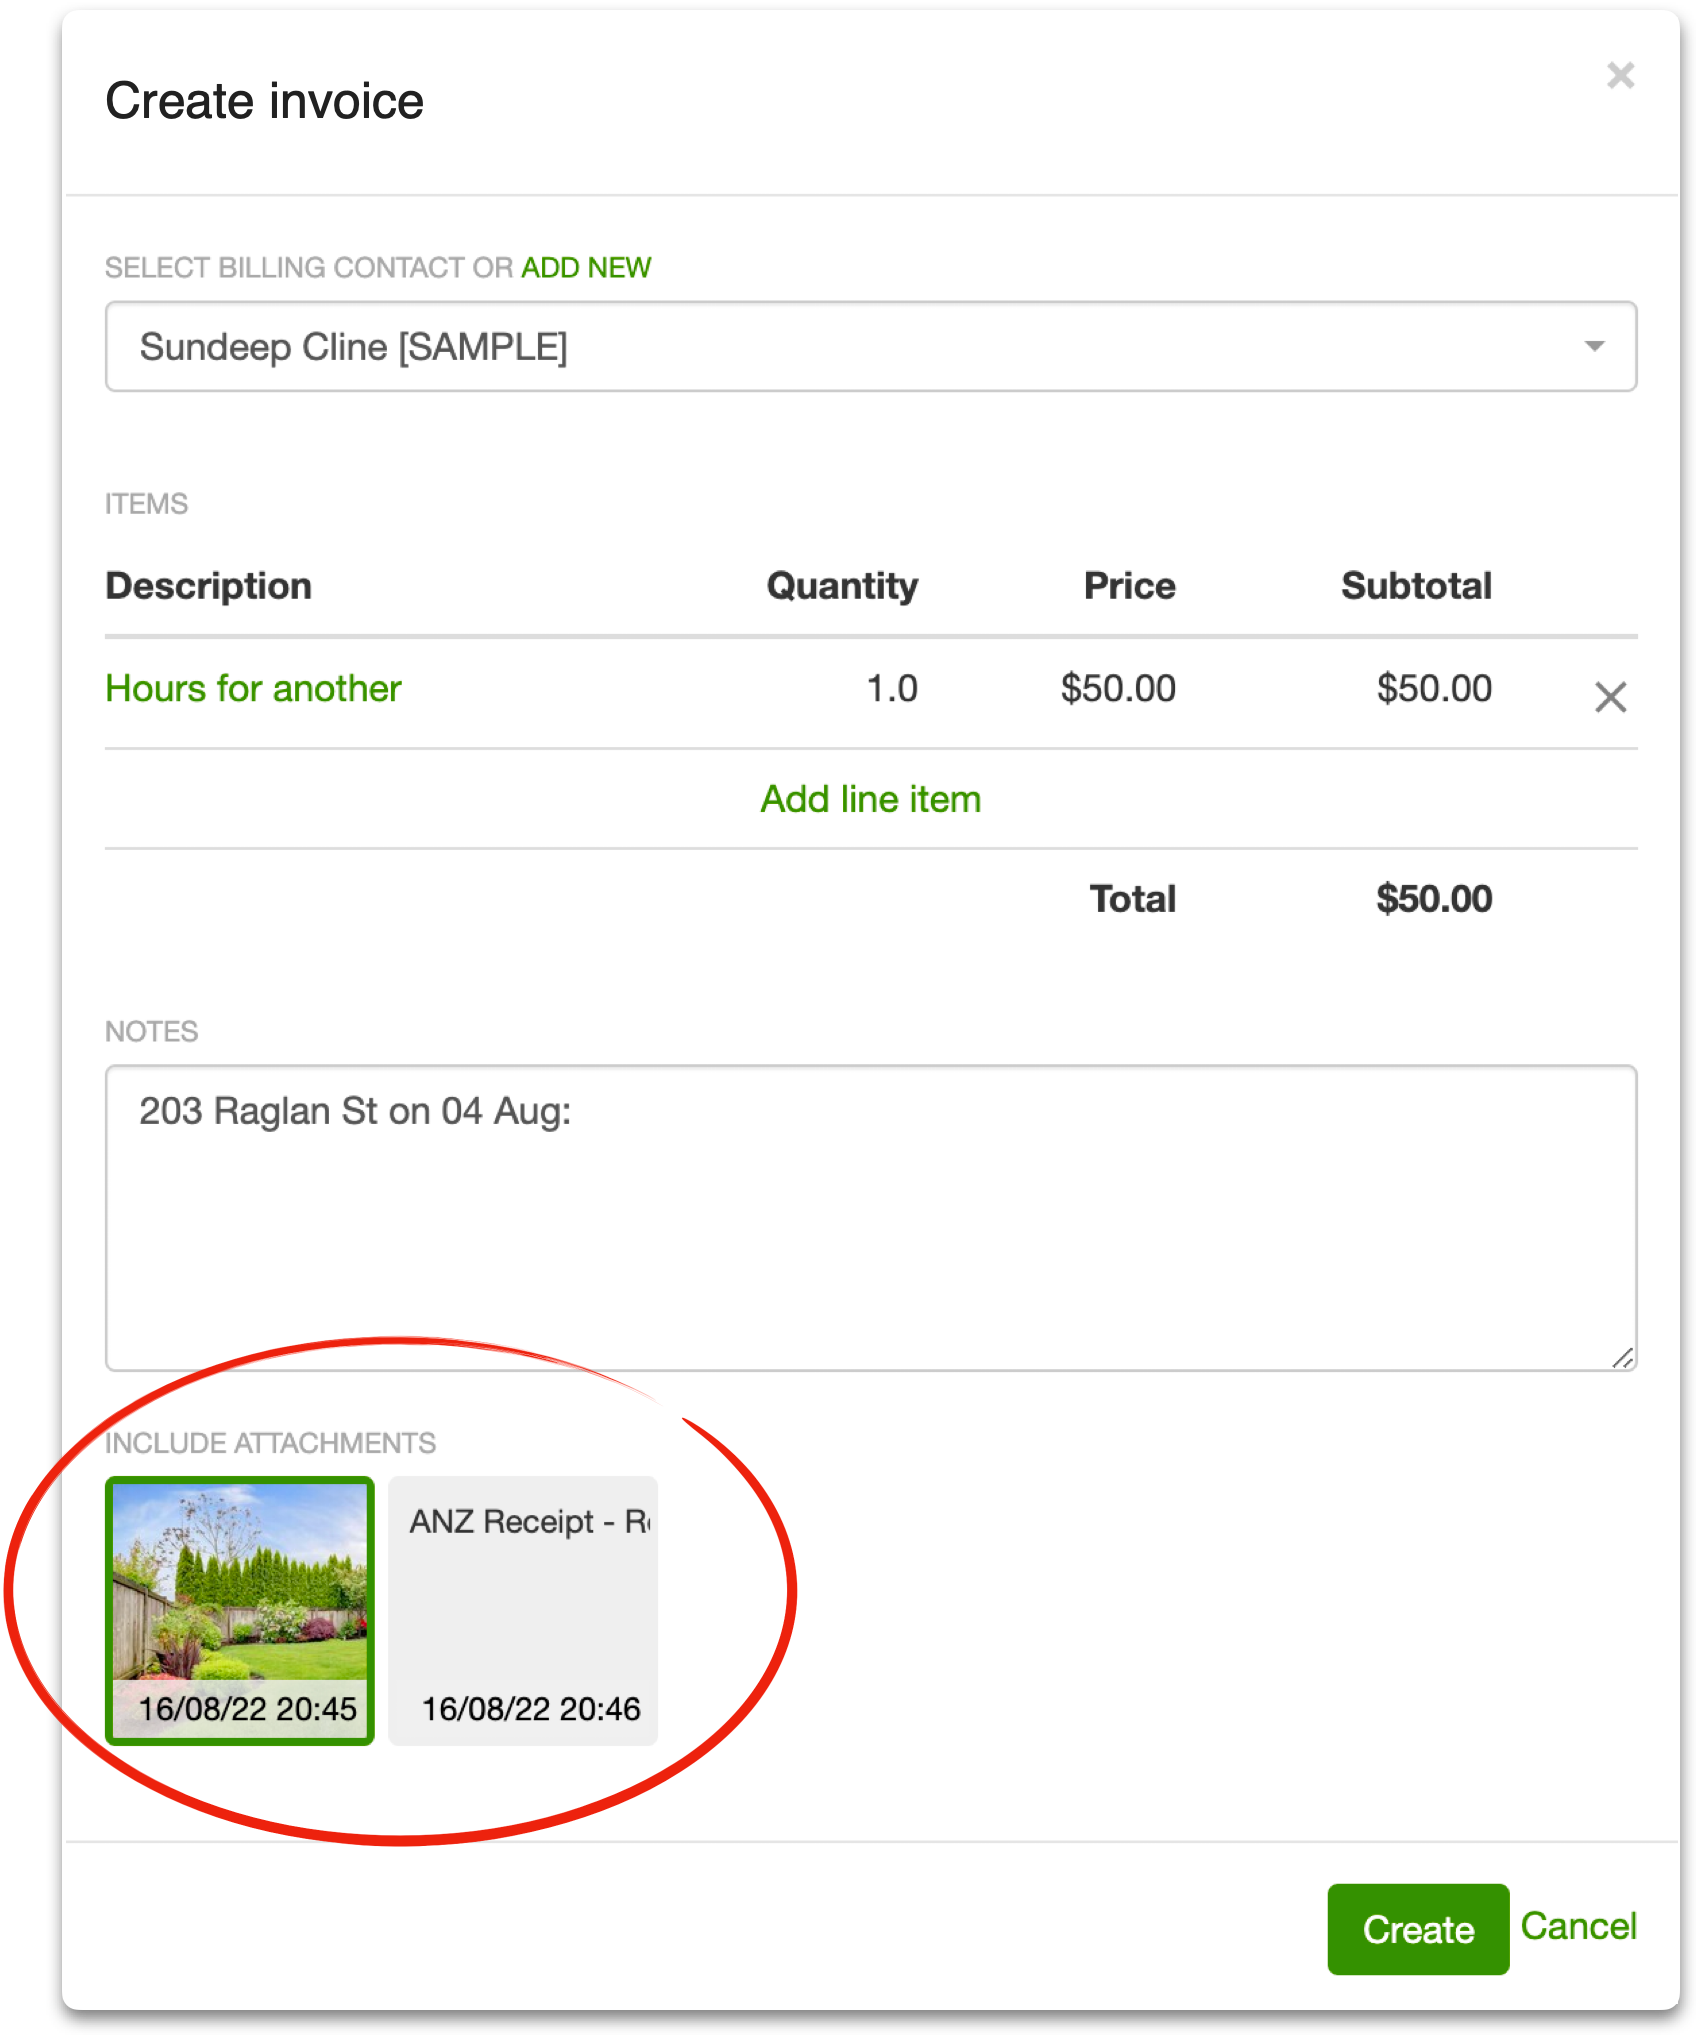
Note to Xero customers – Xero requires additional credentials from SortScape in order to upload attachments to invoices. If you don’t see the “Include attachments” section when creating invoices from visits that have attachments, then your SortScape account might not have the proper permissions from Xero. To fix this, simply disconnect SortScape from Xero and then reconnect.
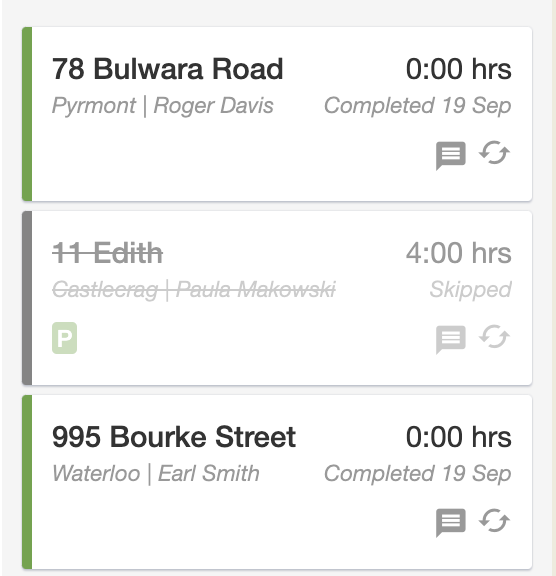
View skipped visits on the schedule
Skipped visits were previously not shown on the schedule. Skipped visits are now shown on the schedule with a line through the description so that you know a visit was skipped on that day.
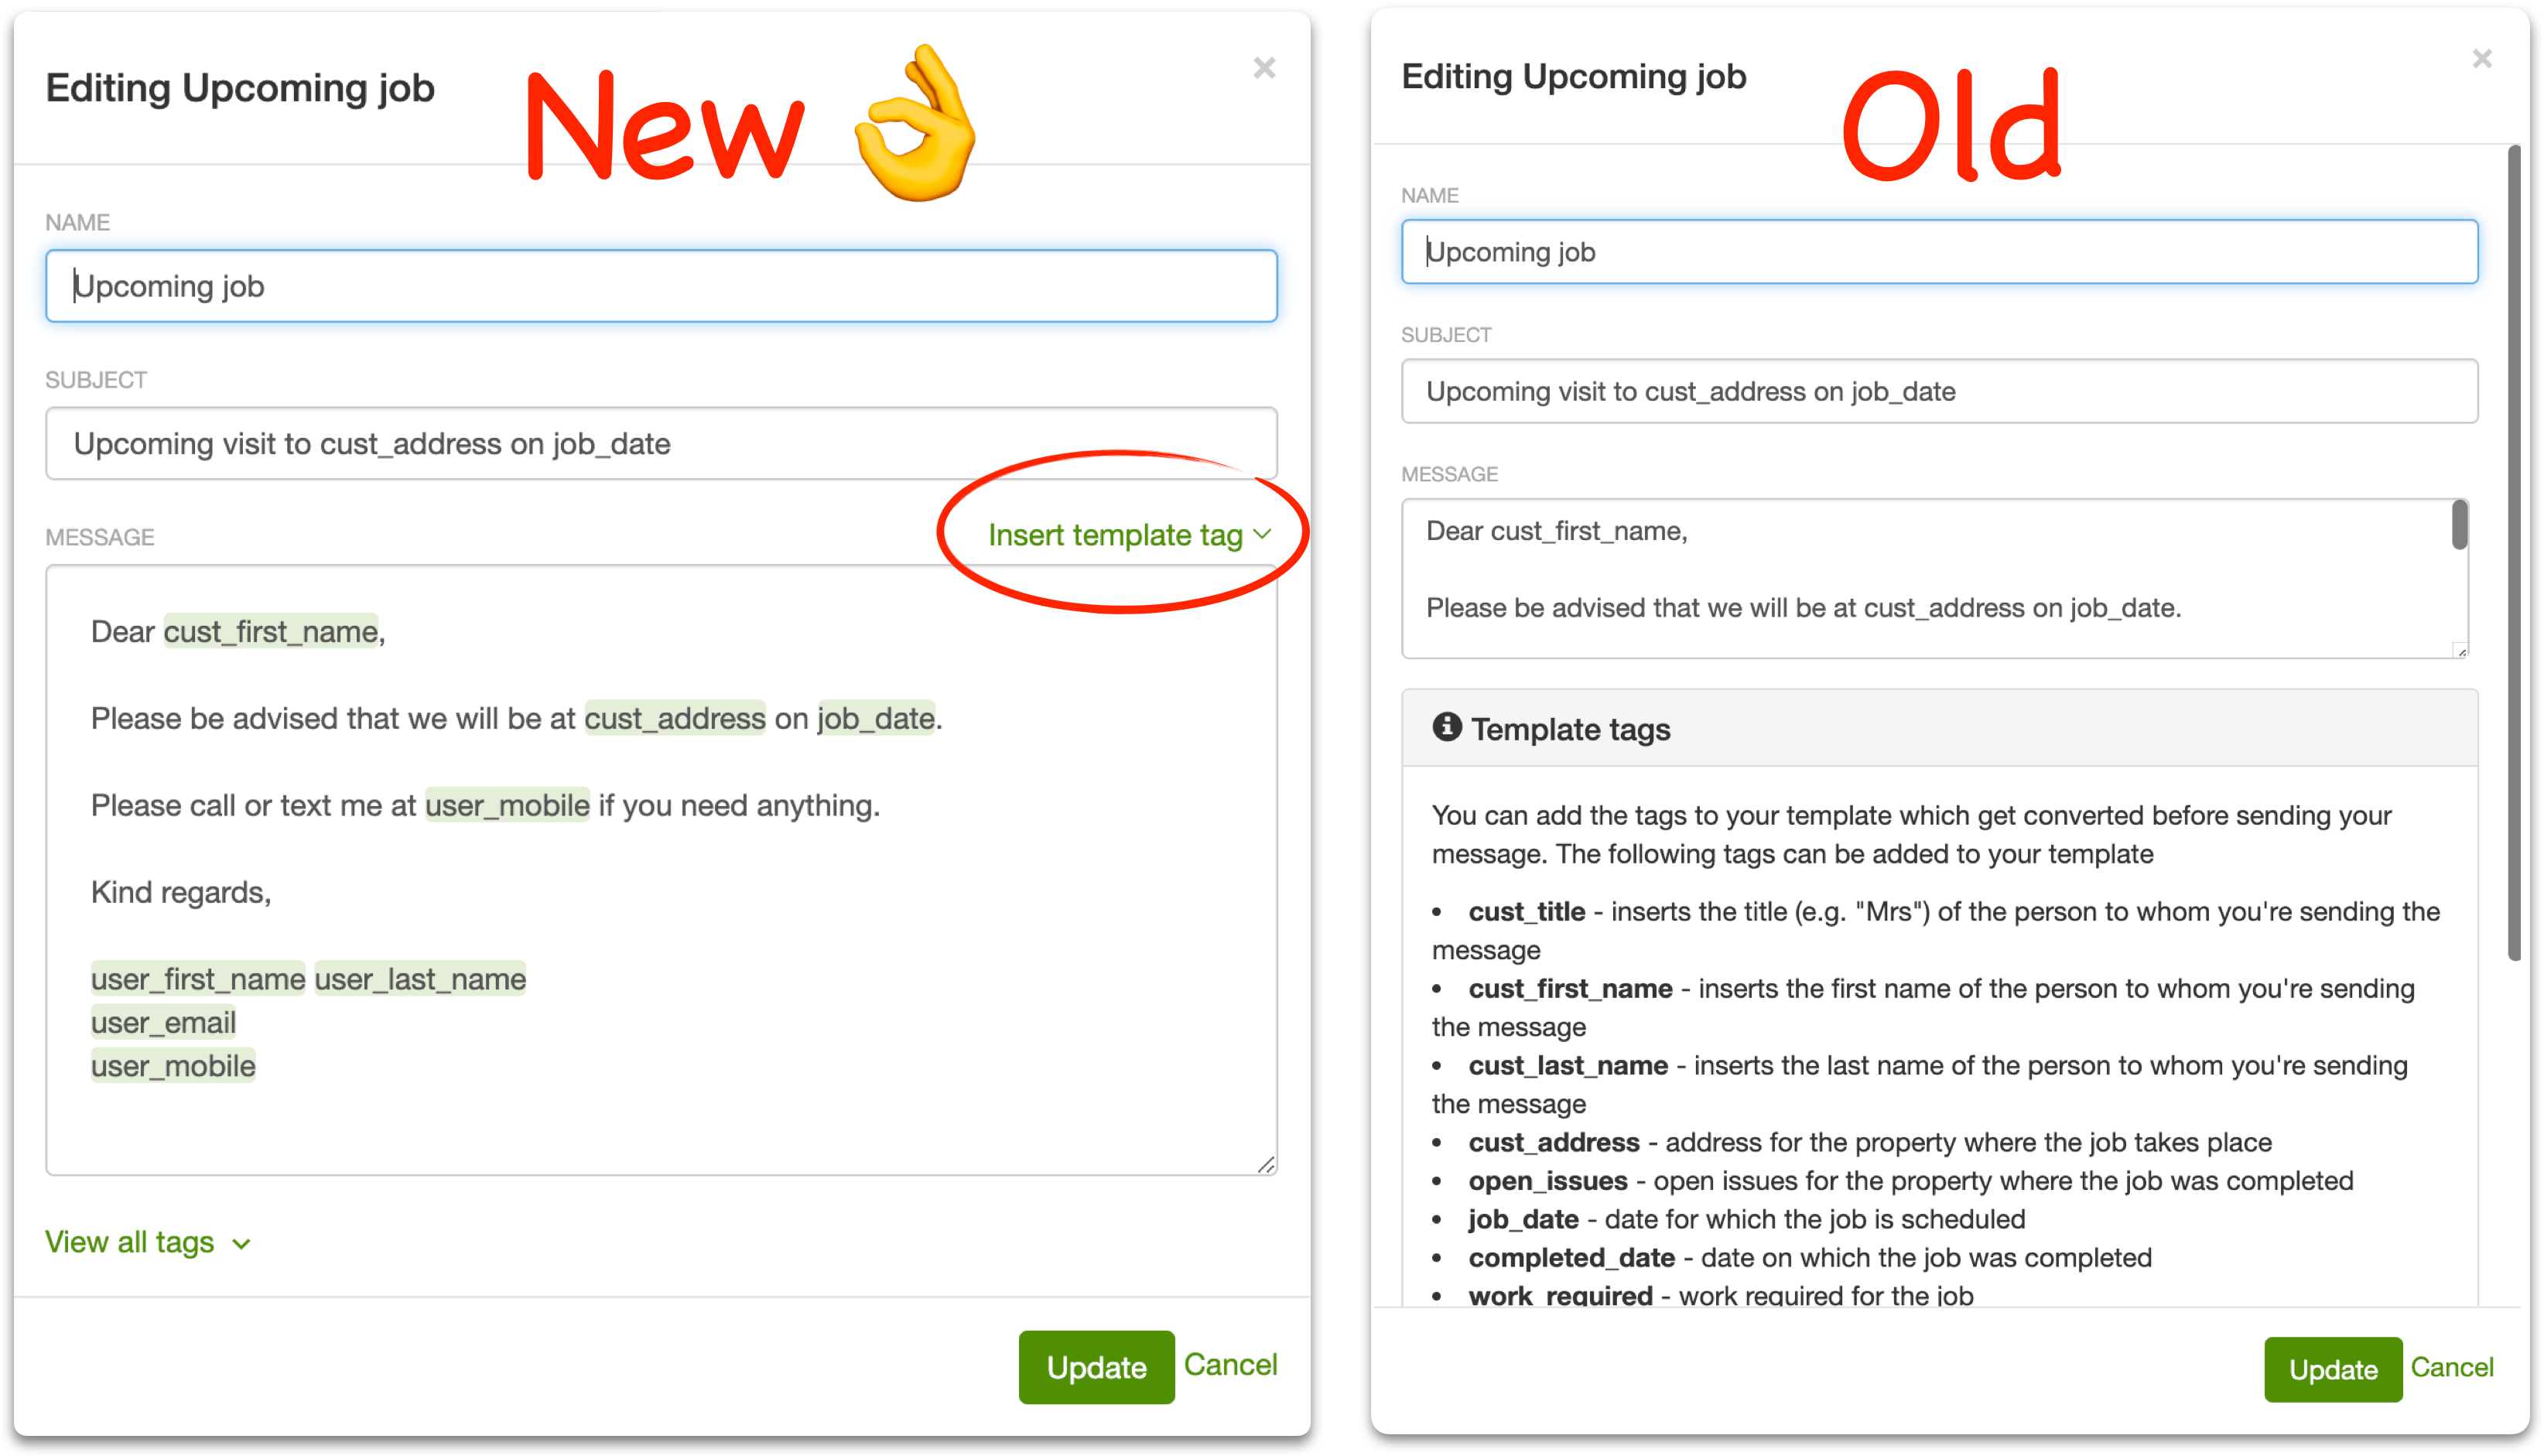
Improved email and SMS template editor
SortScape’s message templates let you send customers a variety of text messages and emails for different occasions. To improve the template editing experience, we introduced a new editor with an “Insert template tag” function for quickly selecting/inserting template tags. We also added tag highlighting to improve readability. To see how much better this is, just compare the “new” and “old” screenshots below!
These are some of the major features recently added to SortScape. We’ve got a lot more planned for the rest of 2022 and 2023 so stay tuned and keep the feedback coming! Until next time, here’s a little tip about a useful feature you may not know about…
Did you know?
You can add checklists to your visits so your employees have step-by-step instructions to follow?
To add a checklist to a visit, simply start any line in the “Work Required” field with a dash (“-“). Each line started with a dash will then turn into a checklist item when you save the visit. For example, typing something like this:

…will yield something like this when you save the visit:
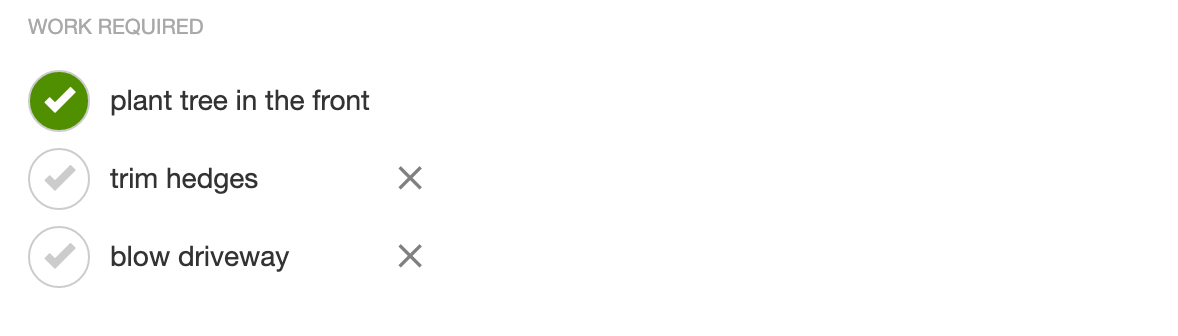
Any checklist items that employees mark complete will turn green and get added to the “work done” section of the visit.