

Calendar view
Last updated:
Calendar view lays jobs out on a time grid. Use it when a customer needs a set arrival window, or when the crew needs start and finish times on the schedule, in the mobile app, or on a printed runsheet.
If customers are happy for the work to happen any time that day, stay on Day, Week, or Month and plan with Smart ETAs instead. See How do I add start and end times to jobs?.
Which view to use
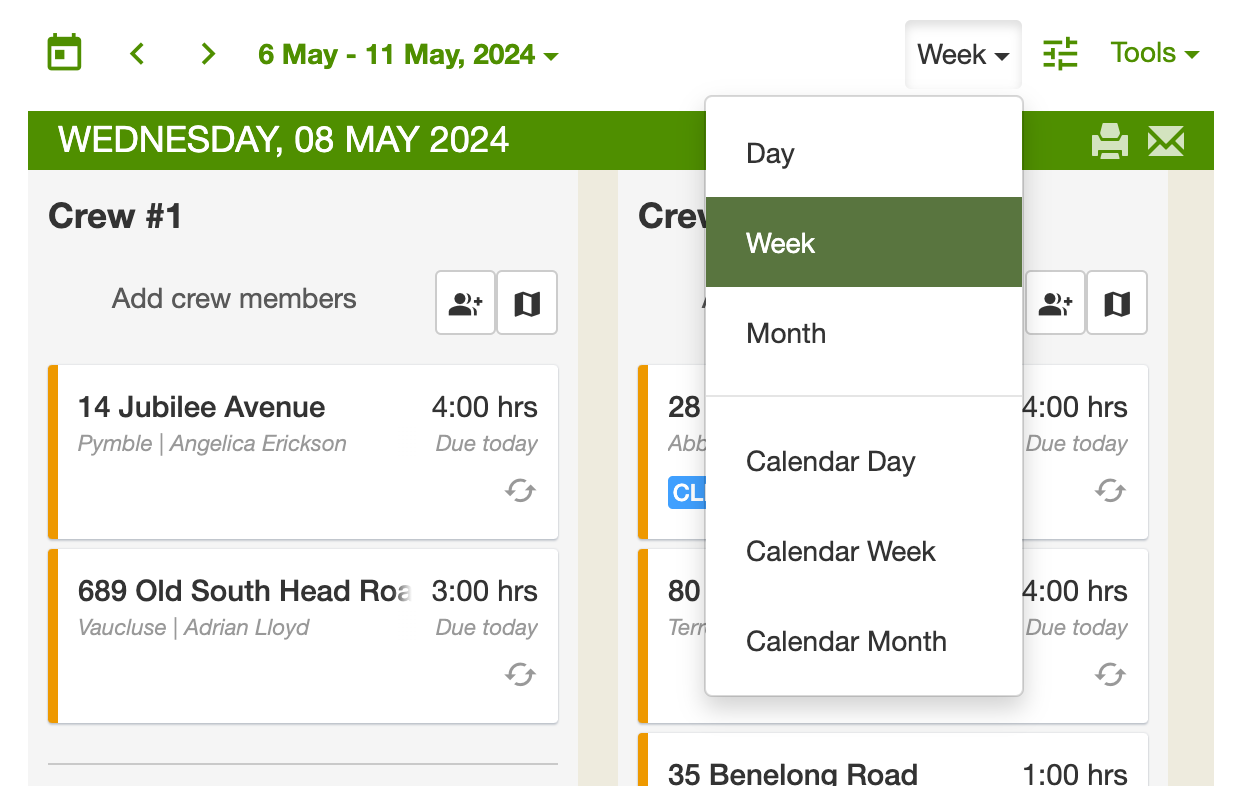
Section titled “Which view to use”The view menu on Schedule has two families. Day, Week, and Month show jobs grouped into job runs. Calendar day, Calendar week, and Calendar month show jobs by time of day.
- Day: running today. Put employees on job runs, set the order of jobs, and check the route.
- Week: moving jobs between days and job runs within a week.
- Month: planning ahead and finding room. Each week is one row across the screen. The bottom of each job run shows its total hours (and value, if you use estimated values), so a day with a low total has space for another job. See How schedule hour totals work.
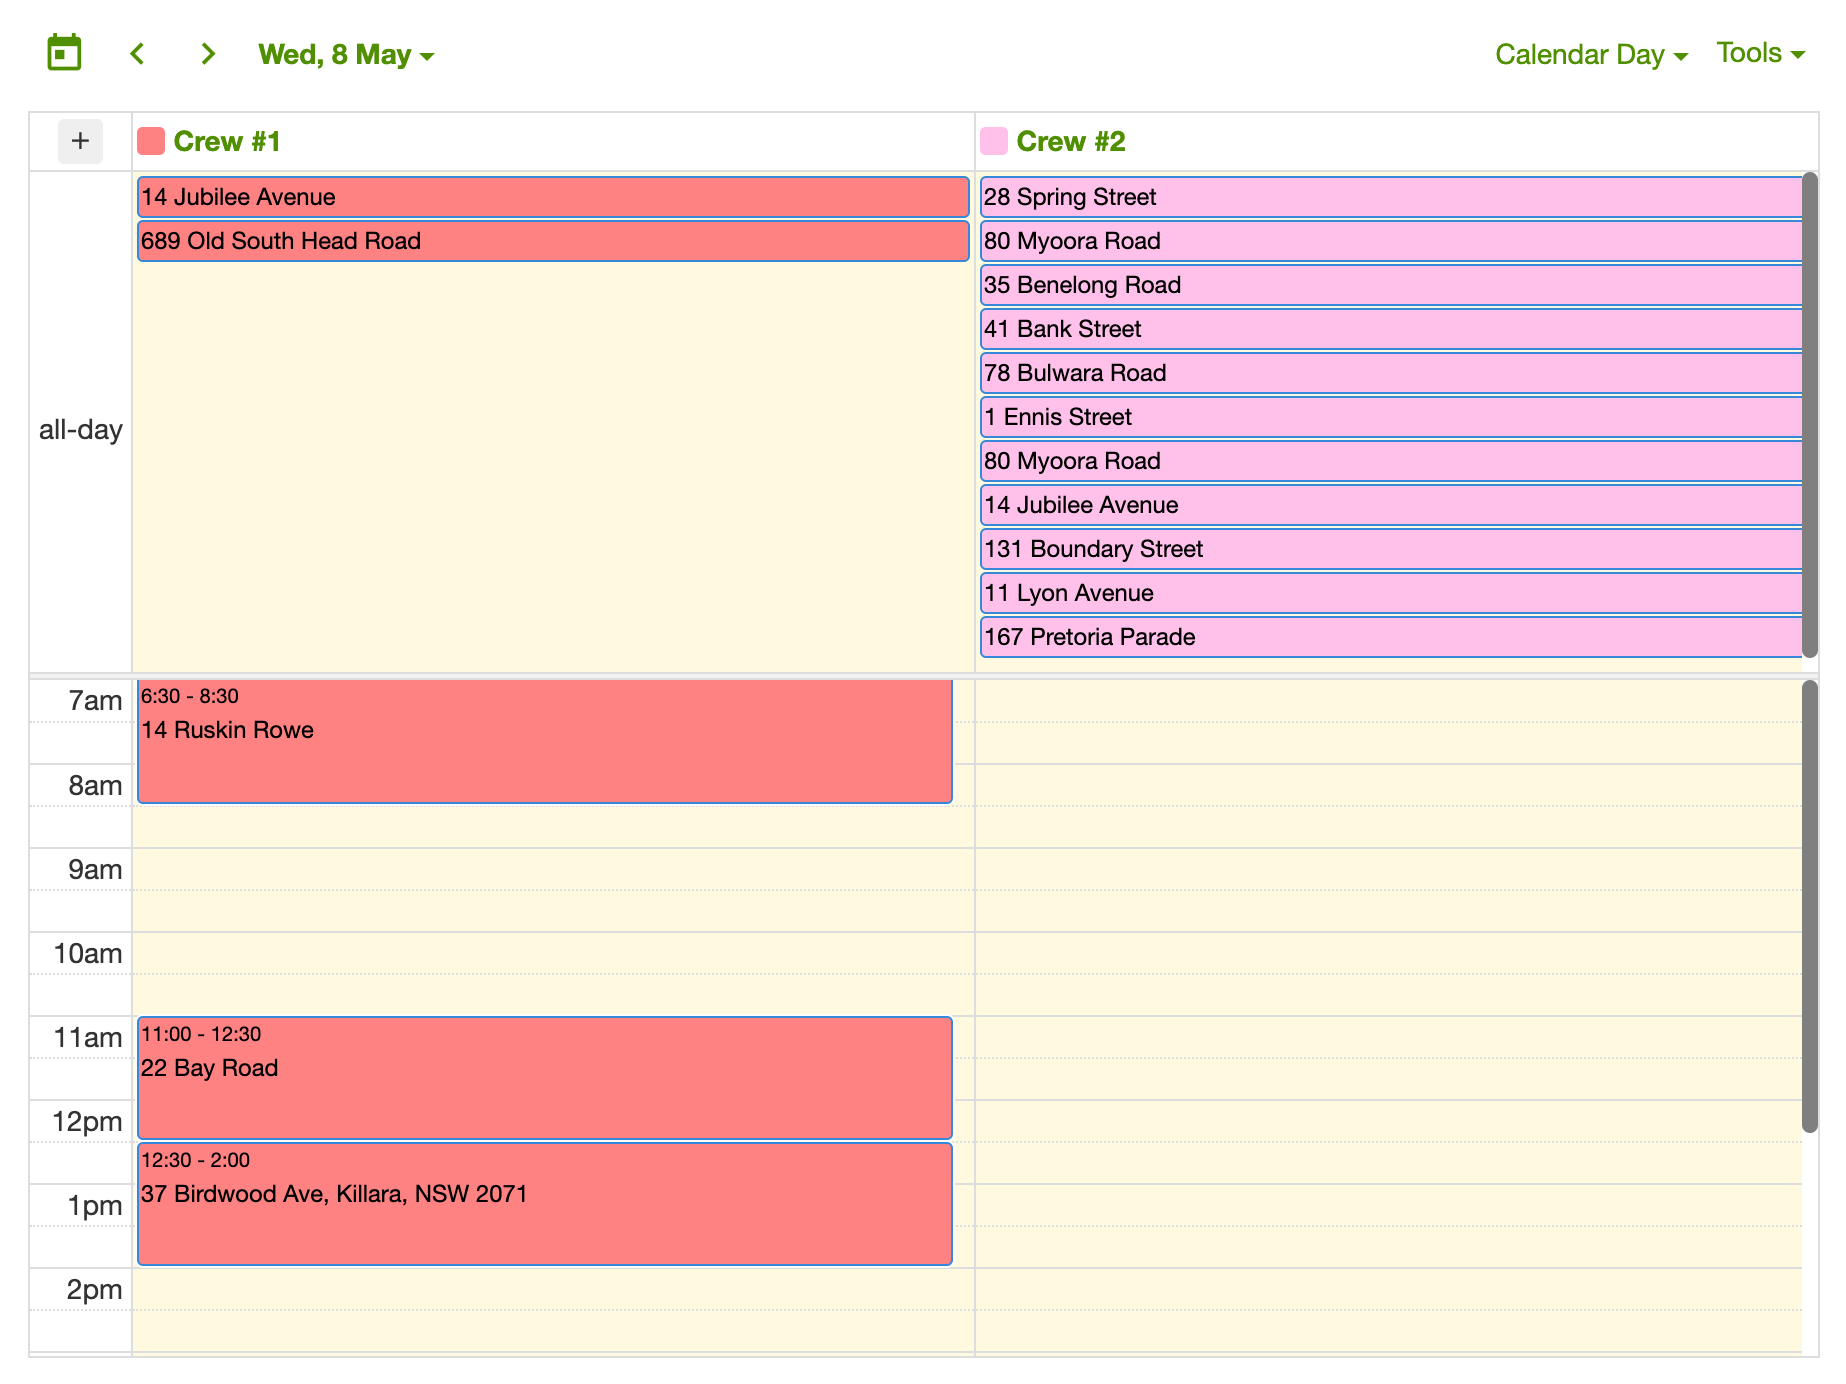
- Calendar day, week, and month: only useful when your jobs have start and end times. Jobs without a time all sit in the anytime band at the top of the day, so on a busy day the calendar is just a list with no time slots to plan around.
Month view shows every job, so a busy week is tall and you scroll to see the rest of the month. To fit more on screen, open the Schedule display settings (three horizontal sliders), set View mode to Compact, and set Run heights to Fit content. See Using the display settings on the schedule.
Turn it on
Section titled “Turn it on”Open Settings → Jobs → Job settings, then turn on Enable calendar view.
Switch to the calendar
Section titled “Switch to the calendar”Open Schedule. Open the view menu (it shows the current view, such as Week) and choose Calendar day, Calendar week, or Calendar month.
Anytime jobs sit in a band at the top. Timed jobs sit in the time slot for their start and finish. You can change the order of anytime jobs on Day, Week, and Month. The calendar does not reorder that band.
This video walks through the difference between the day, week, and month schedule and calendar view:
Add or change a time
Section titled “Add or change a time”Open the job and enter a start and end time, or tick Any time to move it into the anytime band. See Start and end times in the calendar schedule, which also covers time clash warnings and lunch breaks.
On calendar day or week, drag across an empty stretch of the day to add a job for that time.
Move a job or change how long it runs
Section titled “Move a job or change how long it runs”On calendar day or week:
- Drag the job to another time or day. The start and the finish move together.
- Drag the bottom edge to change when it finishes. That changes how long the job runs. The top edge stays put, so you cannot drag the start time on its own. Drag the whole job, or edit the times on the job.
Click a job to open it.
There is no line on the calendar for the current time of day.
What you see on each job
Section titled “What you see on each job”Each block shows the job title, then a second line with the contact name or the property address. Which one is the title depends on Job title on schedule in Settings → Jobs → Job settings. See Job title on schedule.
Each block is the colour of its job run’s crew, so every job in a run is the same colour. Runs without a crew are grey. The block keeps that colour when you complete or invoice the job. The status colours (red, orange, green and so on) only show on Day, Week, and Month, so switch to one of those to see at a glance which jobs are done. Skipped jobs show with a line through the title. See What do the color codes on the schedule mean?.
Long names are cut off. A short job is only as tall as the time you set, so the name can be cut off even when the block is wide.
What is not on the calendar
Section titled “What is not on the calendar”Day, Week, and Month still have a few tools that calendar day, week, and month do not:
- Open issue badges, such as GT for General task, show on job cards in Detailed view. Calendar blocks do not. Open the job and look under Issues. See Tracking customer requests with issues.
- The Unscheduled column. Switch to Day, Week, or Month to grab an unscheduled job. See How can I view the list of unscheduled jobs?.
- Job status colours. Calendar blocks use the crew colour and do not turn green when a job is complete.
- Schedule display settings (the three sliders, including Compact and Detailed). See Using the display settings on the schedule.
Route optimization reorders anytime jobs. A job with a fixed time stays in its slot. See Route optimization.