Route optimization
Last updated:
In SortScape, we’re all about making your day more efficient. One tool designed to help with that is the Route Optimization feature. This feature allows you to optimize your routing by reordering your job runs to minimize travel time, meaning less time on the road and more time at your job sites.
Here’s how to use it:
- Go to your SortScape app and open up the schedule.
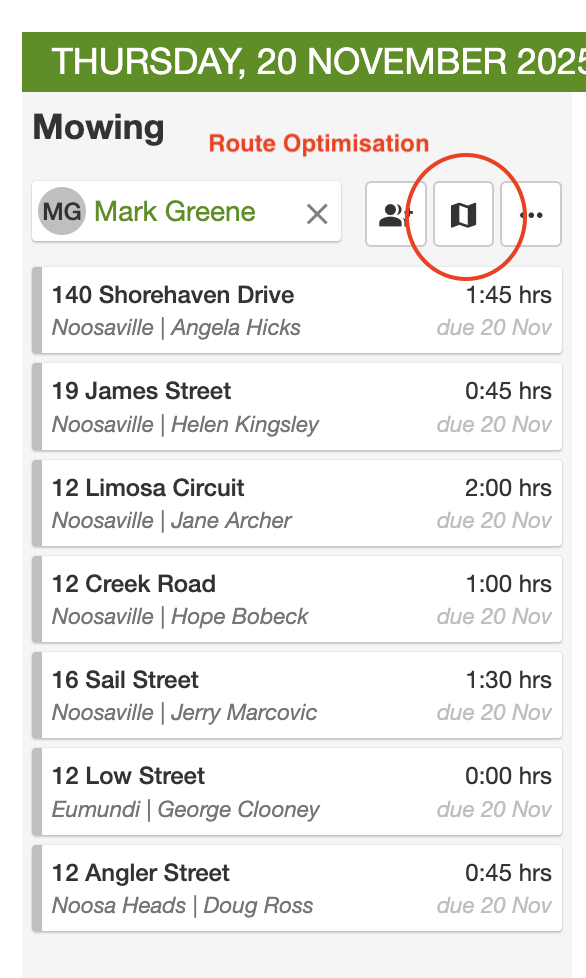
- Click the map button at the top of each job run. This will open a modal that shows all visits for that particular job run on a map. It’s a great way to visualise your day.
- Set your start time. Enter when you plan to start your day to see estimated arrival times for each visit and when you’ll finish.
- Set your start and end address. If you start your day at the office/shed or at home and end it there, you should put that as your start and end address to allow us to optimise your route properly.
- Review the route. If you notice that your route doesn’t look quite right, look out for the ‘Optimize Route’ button. If your route could use some tweaking for better efficiency, this button will be enabled.
- Optimize. All you need to do is click on the ‘Optimize Route’ button. The SortScape app will then reorder your jobs to make sure you’re taking the quickest route possible.

Using Route Optimization not only saves you time, but it also reduces non-billable time spent on the road. That’s more time you can dedicate to your tasks, your clients, and growing your business.
Smart ETAs (estimated arrival and finish times)
Section titled “Smart ETAs (estimated arrival and finish times)”Smart ETAs are SortScape’s automatically calculated arrival and finish times for each visit on a job run. They give you a realistic plan for the day — when to arrive at each property and when you’ll finish — without entering a start and end time on every visit.
Smart ETAs are shown only in the route optimization view (the map modal). They do not appear on the main schedule or on printed runsheets. If you need times visible on the schedule or print view, see How do I add start and end times to visits? for Calendar view.
Where to find Smart ETAs
Section titled “Where to find Smart ETAs”Smart ETAs are easy to miss because they live inside route optimization, not on the schedule itself. To view them:
- Open the Schedule (day or week view)
- Click the map button at the top of the job run you want to plan
- Enter a start time and start address — Smart ETAs appear above each visit in the list on the left
The map button is the only way to open route optimization and see Smart ETAs for a run.
How Smart ETAs work
Section titled “How Smart ETAs work”When you set a start time and start address, SortScape calculates:
- Arrival time — when the crew should reach each property
- Finish time — when they should leave, based on the visit’s estimated duration
- End of day — when the crew is expected to finish the run
These times factor in your day’s start time, each visit’s estimated duration, and travel time between stops. If you click Optimize Route, the visit order is reordered for efficiency and the Smart ETAs are recalculated to match.
Make sure each visit has estimated time set for the most accurate Smart ETAs. Use the Presets dropdown on the visit form to pick a duration, then fine-tune with - and +. See Setting estimated time.
Estimated vs actual times
Section titled “Estimated vs actual times”In the route optimization modal, times appear above each visit:
- Grey times are estimates based on your route and visit durations
- Green times are actual logged start and end times after a visit is completed or the visit timer is used
As your crew works through the day, remaining Smart ETAs in route optimization adjust automatically based on real progress.
When to use Smart ETAs vs Calendar view
Section titled “When to use Smart ETAs vs Calendar view”| Smart ETAs (route optimization) | Calendar view | |
|---|---|---|
| Best for | Planning a day’s route and checking estimated arrival/finish times before crews head out | Times that need to appear on the schedule, mobile app, or printed runsheet |
| Where times appear | Route optimization modal only (click the map button on a job run) | Schedule, calendar views, and print view |
| How times are set | Automatically calculated when you set a start time and address | Manually entered on each visit |
| Route optimization | Works with anytime visits | Only works with anytime visits; fixed-time visits stay in their time slots |
| Setup required | Open route optimization and set a start time and address | Enable Calendar view in Visit settings |
If you want to plan arrival and finish times for a flexible Classic schedule day, Smart ETAs in route optimization are the simpler option. If you need staff to see those times on the schedule, in the mobile app, or on a printed runsheet, use Calendar view instead.
Default start times
Section titled “Default start times”Admins can set the default start time used for route optimisation on the Visit Settings admin page.
Adding a shed or home as a start address
Section titled “Adding a shed or home as a start address”A shed or home can be added as an office internal property by clicking add new
near start address, searching for the address and clicking create.
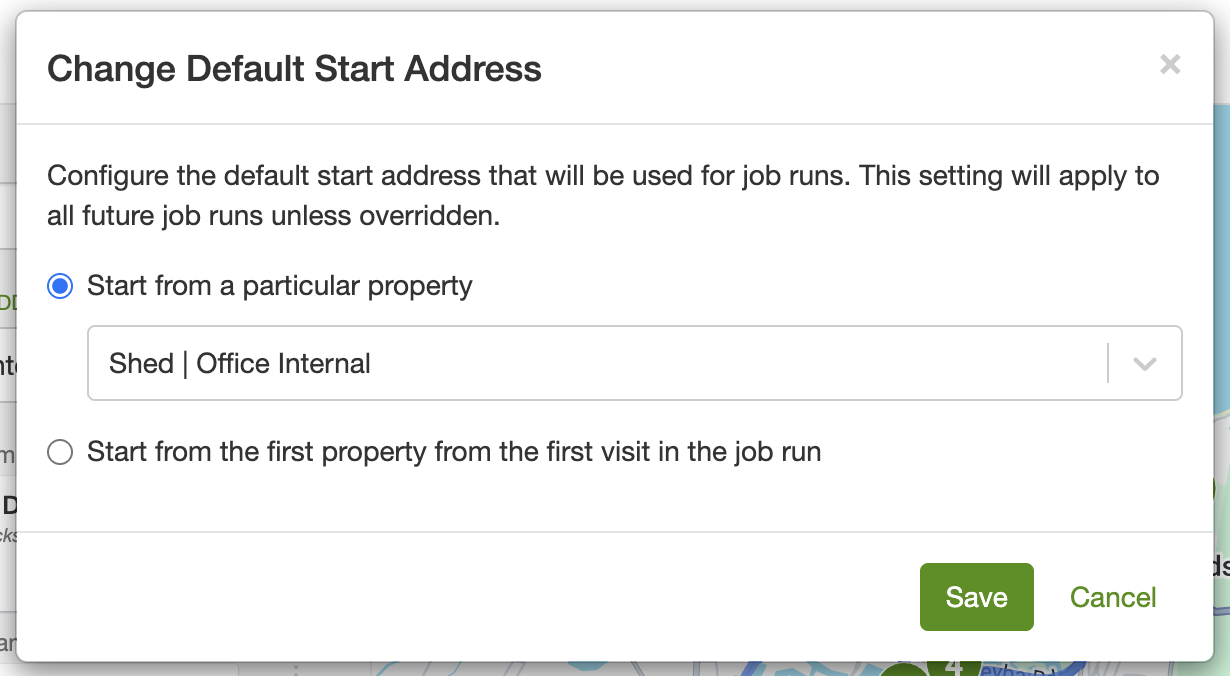
Default start address
Section titled “Default start address”To change the default start address, click ‘SETTINGS’ near the start address.
Choose either:
Start from a particular property like your shed or home (if created) or
Start from the first property from the first visit in the job run.
Manual reordering
Section titled “Manual reordering”Don’t like the optimized route? Simply drag and drop visits to reorder them manually. The route automatically recalculates as you make changes.
Finish close to end address
Section titled “Finish close to end address”Use this option when you want the route to end near your chosen end address (for example, home or the office). When Finish close to end address is turned on, the system orders the run so that the first job is the one furthest from the end address. You then work from farthest to nearest and finish close to where you need to be.
Where to find it: In the route optimization modal, the checkbox appears below the start time and above the Start address field. It only appears when the run has at least two all-day visits and no visits are completed yet (so the whole run can be optimized).
If you’re an admin and want this behavior for all new runs, turn the option on and click Set as default. Your choice is saved for this run and, when set as default, for future runs.
Large routes
Section titled “Large routes”The default route optimization can handle routes up to 25 visits. For customers on the premium plan we are able to optimize routes up to 150 visits. Keep in mind, that this optimisation may take a while.
Notes are included as stops in the route optimization when you fill out the address field.