

Job timer
Last updated:
Job timers allow you to automatically capture time spent onsite and avoid time-consuming manual entry.
To use the timer, open a job and click the “start timer” button.
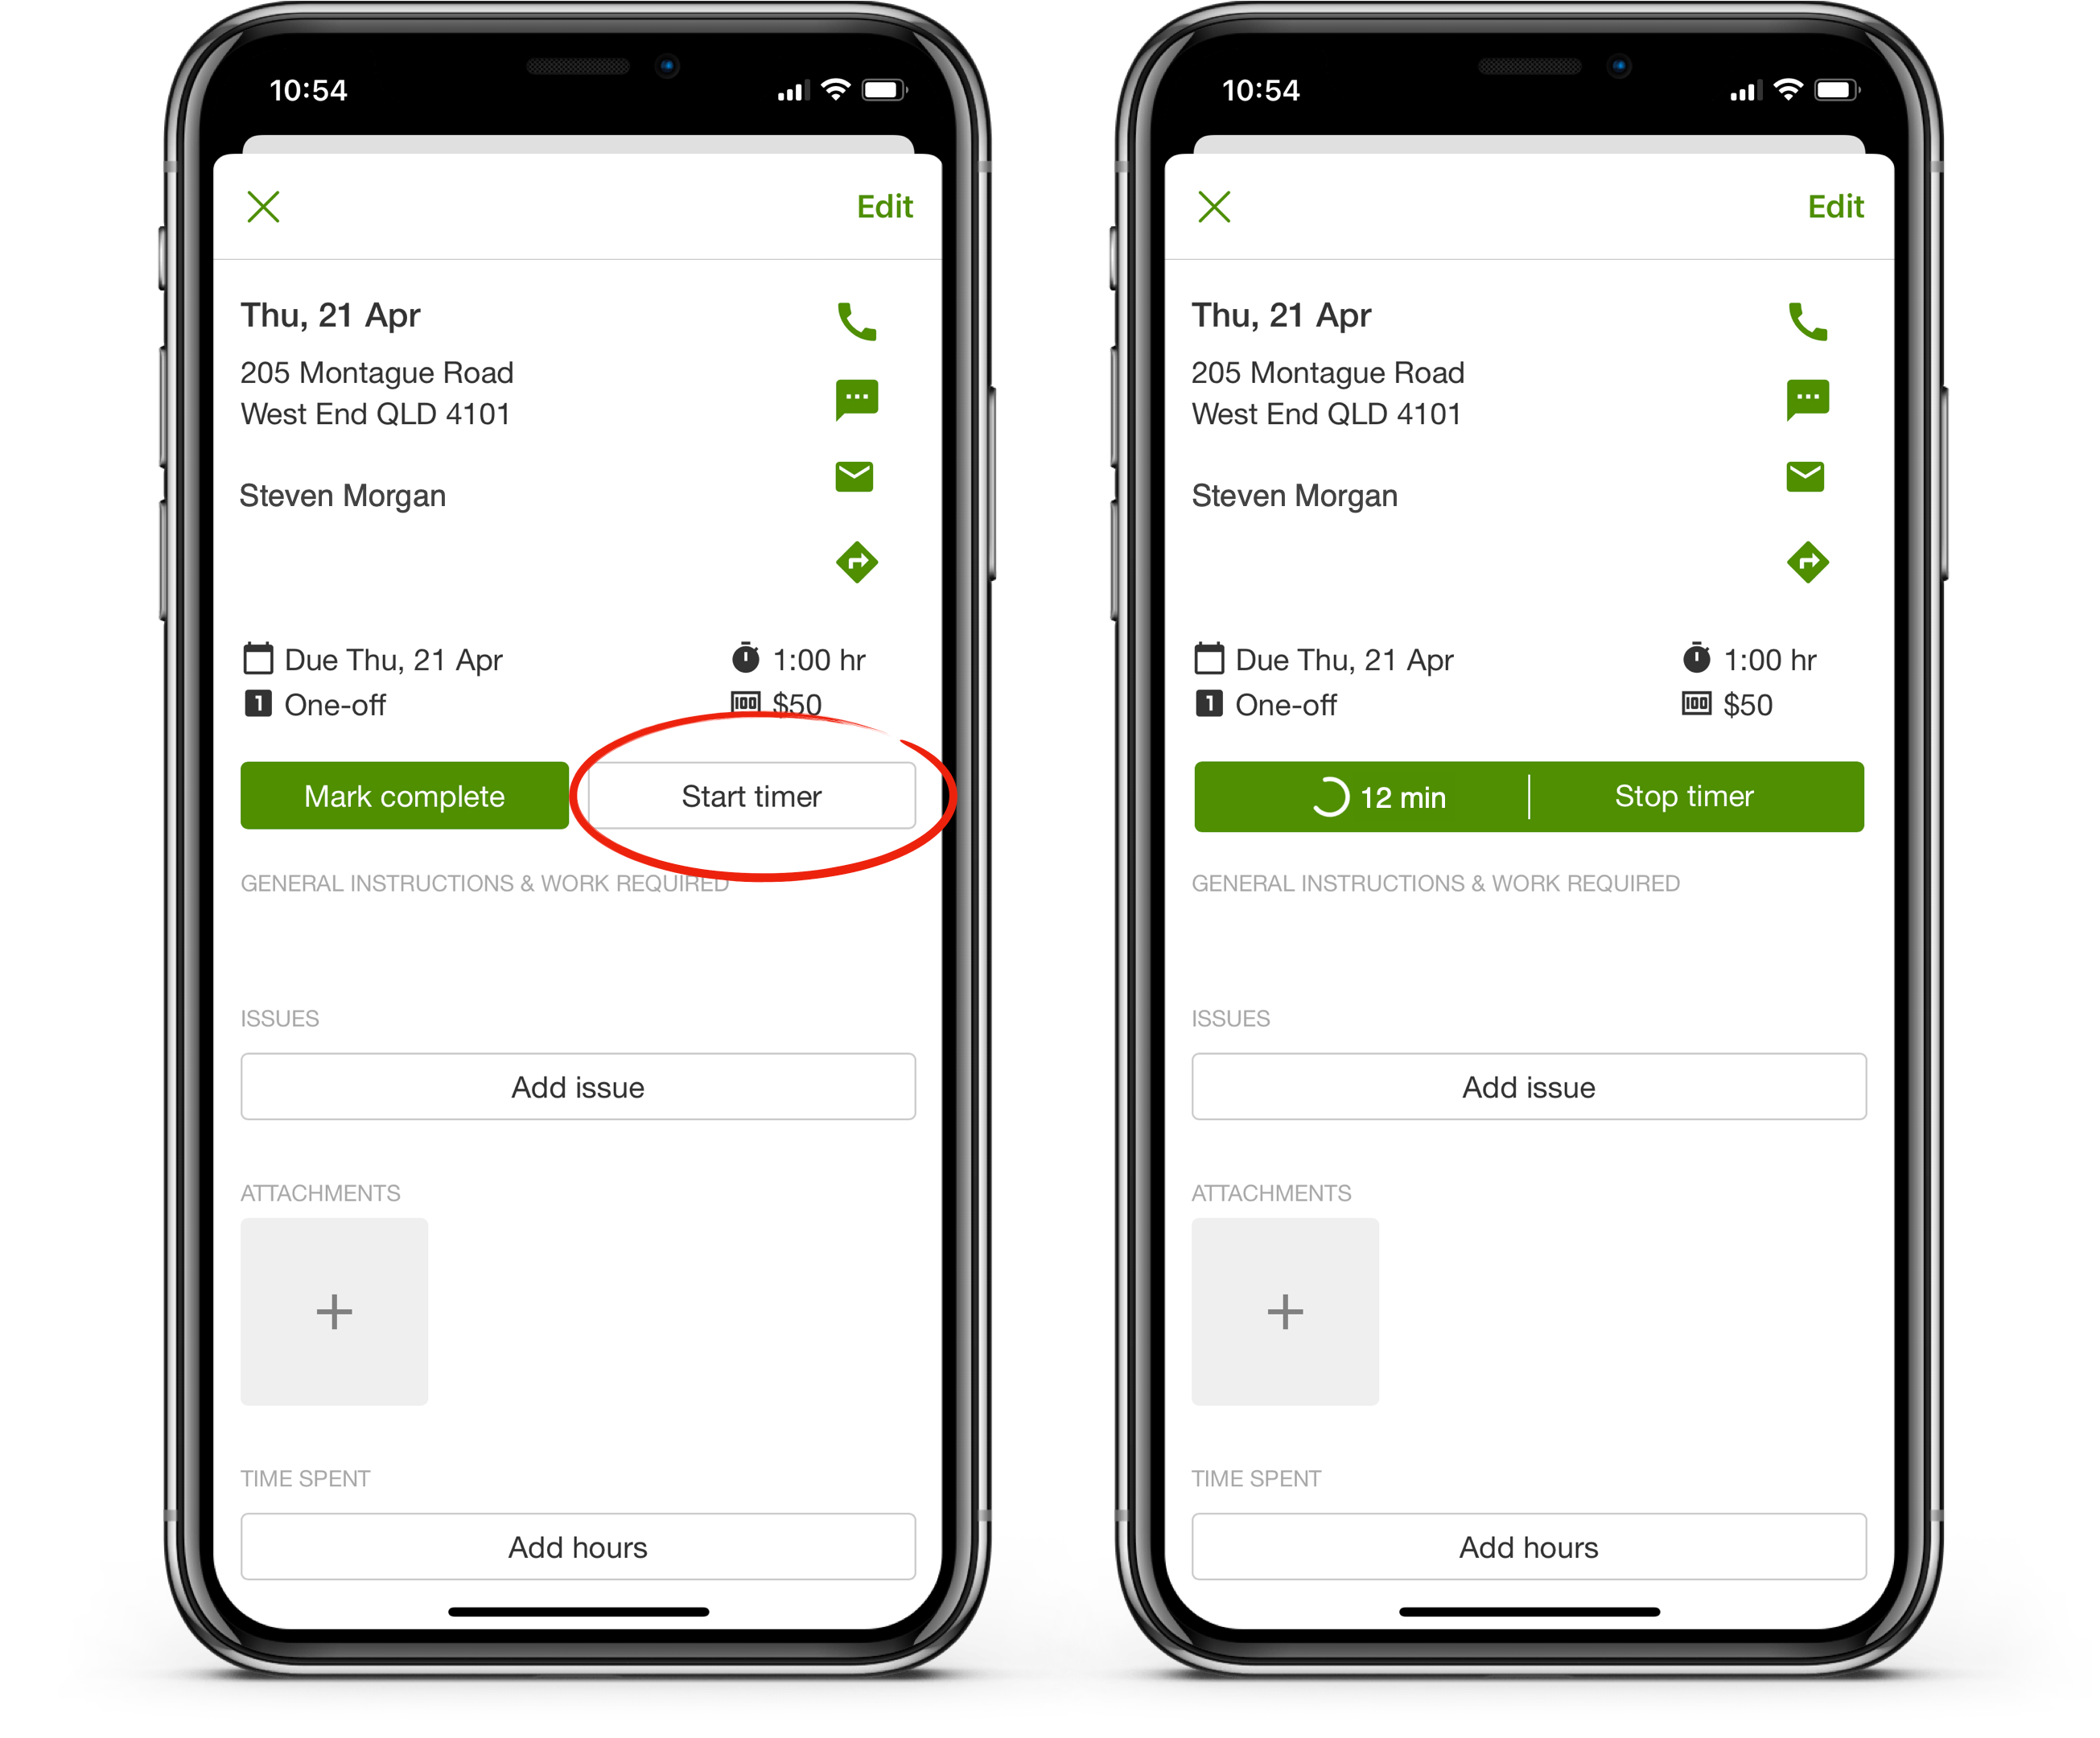
Once you start a timer, others can see in the “time spent” section that a timer has been started for a given user and what time it was started.
When the job is done, you can click “stop timer” to end the timer. Marking a job complete will also end all timers on that job. Once the timer has been stopped, you can edit or delete the hours from the “time spent” section, as long as the job has not yet been invoiced.
A user can only have one timer running at a time. For example, if you have a timer running on Job A, then starting a timer on Job B will automatically stop the timer on Job A.
If your crew forget to tap, experimental Automatic job timers (Premium, iPhone app) can start and stop the timer by GPS as they arrive at and leave each property, or remind them to.
Seeing a running timer on the schedule
Section titled “Seeing a running timer on the schedule”On the schedule, a running job timer also shows on the job card itself. Look for a pill with a pulsing dot and the total time spent at the property (for example 0:47). While a timer is running, that pill replaces the scheduled time window and confirmation icon on the card, so you can spot which jobs are in progress when you scan the day, week, or month view.
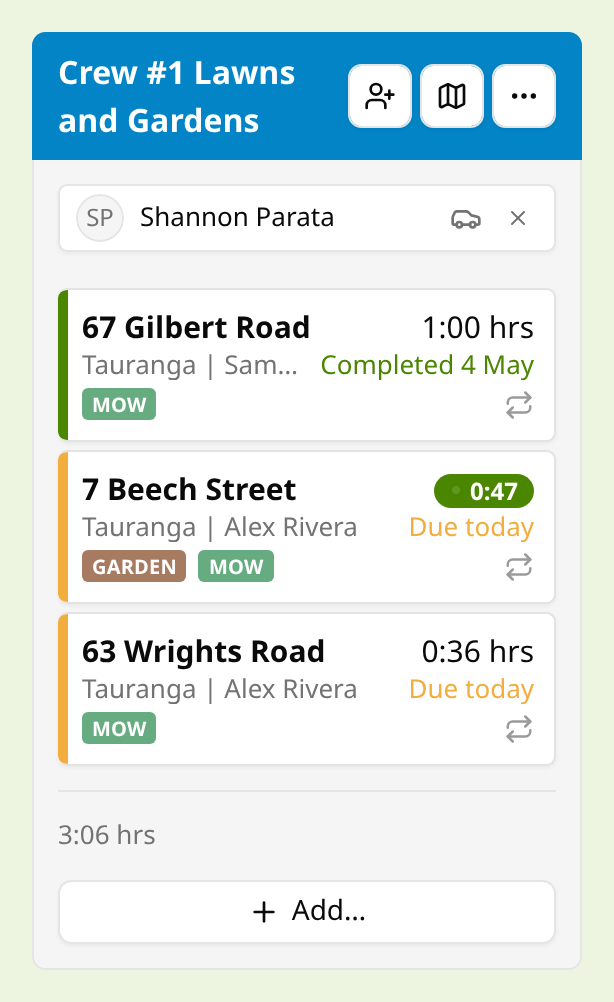
The number is total time spent at the property, not only the time since the latest start:
- It includes all hours already recorded on the job (timer hours and any hours entered by hand), including staff who have already stopped.
- Each currently running staff timer keeps adding to the total live. If two people have timers running, both keep counting up.
If the total goes past the job’s estimated duration, the pill turns orange so you can see the job is over estimate. Hover the pill for a short tooltip (“Total time spent at property”, or “over estimate” when it is orange).
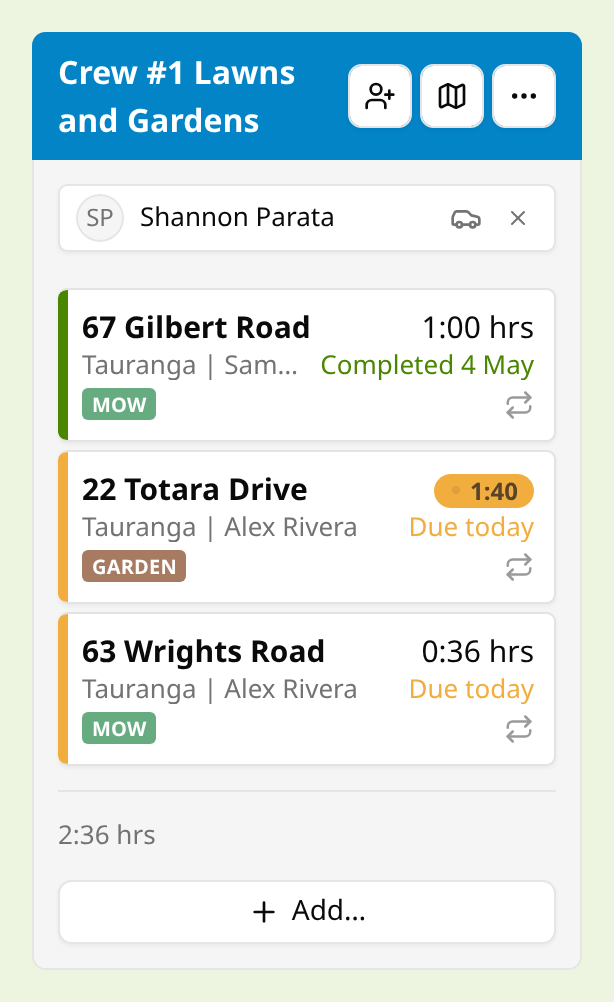
On the month view, or when job cards are very narrow, the elapsed time can hide so only the pulsing pill remains.
When every timer on the job is stopped, the job card goes back to showing the normal scheduled time.
The timer pill on a job card shows live time spent while a timer is running. The hours total on the job run is separate: open jobs still count estimated time until the job is marked complete. See How schedule hour totals work in Scheduling new jobs.
If you forget to start or stop the timer, you can manually enter hours by opening a job and clicking the ”+” or “add hours” button under the “time spent” section. You can do this before or after marking the job complete, but not after the job has been invoiced. See Editing time or line items after a job has been invoiced.
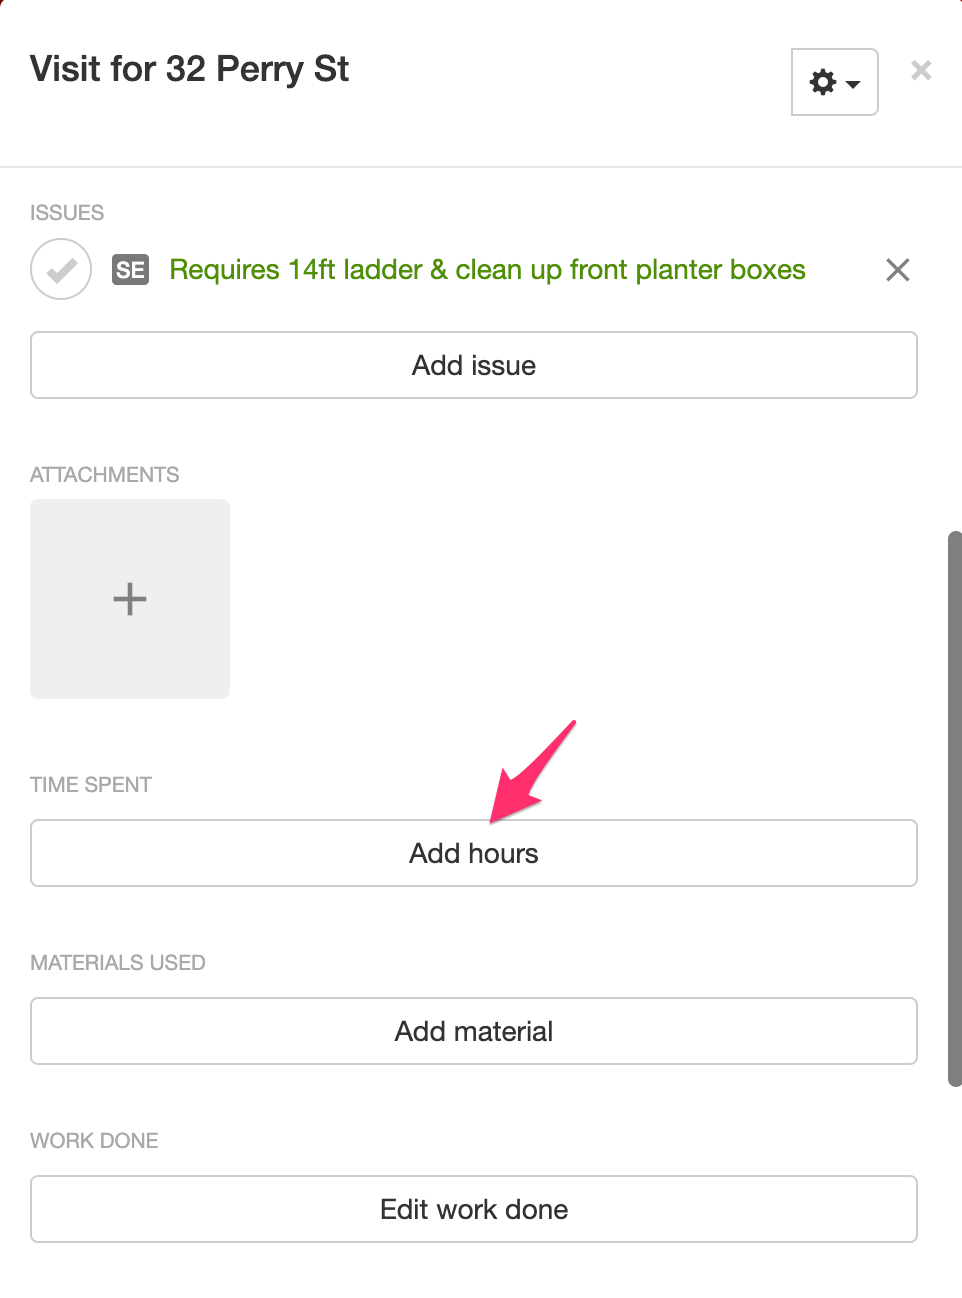
After stopping the timer, you can also edit hours that were entered if you stopped or started the timer at the wrong time, as long as the job has not yet been invoiced.
Restricting changes to job timer hours
Section titled “Restricting changes to job timer hours”In some cases you might want to prevent employees and contractors from making changes to hours captured using the job timer. You can turn this on or off in Settings → Jobs → Job settings using Allow non-administrators to edit job timers. Enabling this setting will allow users with the “employee” and “contractor” roles to edit any time they entered through the job timer.
Starting timers for multiple users
Section titled “Starting timers for multiple users”When you have multiple staff members assigned to a given jobrun, you might want to start the job timer for all assigned staff at the same time rather than starting the timer for each staff member individually. In this case, you can choose the “start timer for whole crew” option. Any user with the correct permissions will see two options when they click the “start timer” button on a given job:
- Start for me
- Start for whole crew
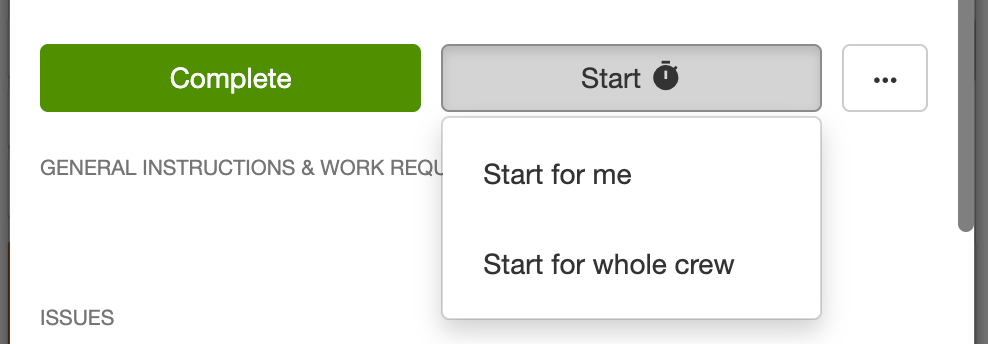
Clicking the “Start for whole crew” option wtill start the timer for each user assigned to the jobrun.
When you stop the timer, you will also see the option “stop for me” and “stop for whole crew.”
By default, all users have permission to start the timer for the whole crew. If you want to restrict this ability to administrators only, you can disable the “Allow non-administrators to start timers for the whole crew” setting in Settings → Jobs → Job settings.
Enabling job timers
Section titled “Enabling job timers”Job timers are part of the Time and Materials tracking feature. If you don’t see the “start timer” button on your jobs:
- Open Settings → Time & materials → Settings
- Make sure Time and materials tracking enabled is turned ON Once enabled, the timer button will appear on all active jobs.
Note: The timer button only appears on jobs that haven’t been marked as complete yet. If a job is already completed, you’ll need to reopen it first to start a timer.