

Tracking customer requests with issues
Last updated:
Issues are special one-off tasks that need to be done on the next job to a property. For example, a customer might call and ask you to trim the hedges or fix a broken broken sprinkler on your next job. In these instances you can create an issue for that customer so that employees in the field see the request, fulfil it and mark it complete when done.
Adding issues
Section titled “Adding issues”From the Schedule, click on the job where you want the issue to appear.
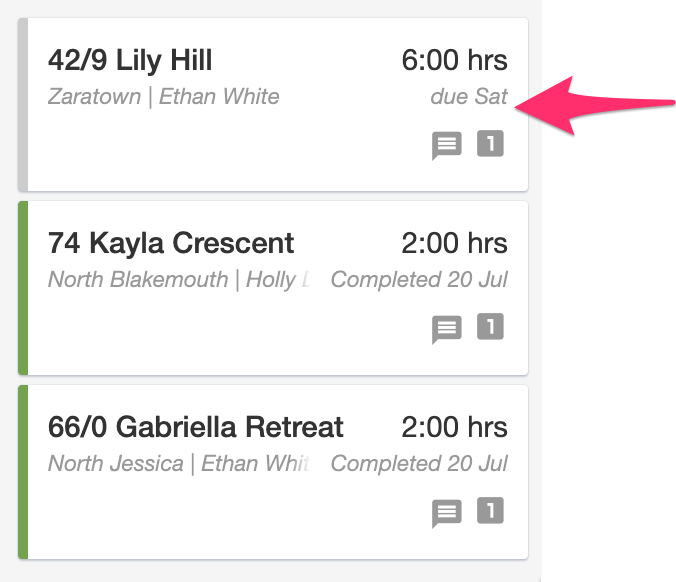
When the job dialog opens, go to the ‘Issues’ section and click to add a new issue:
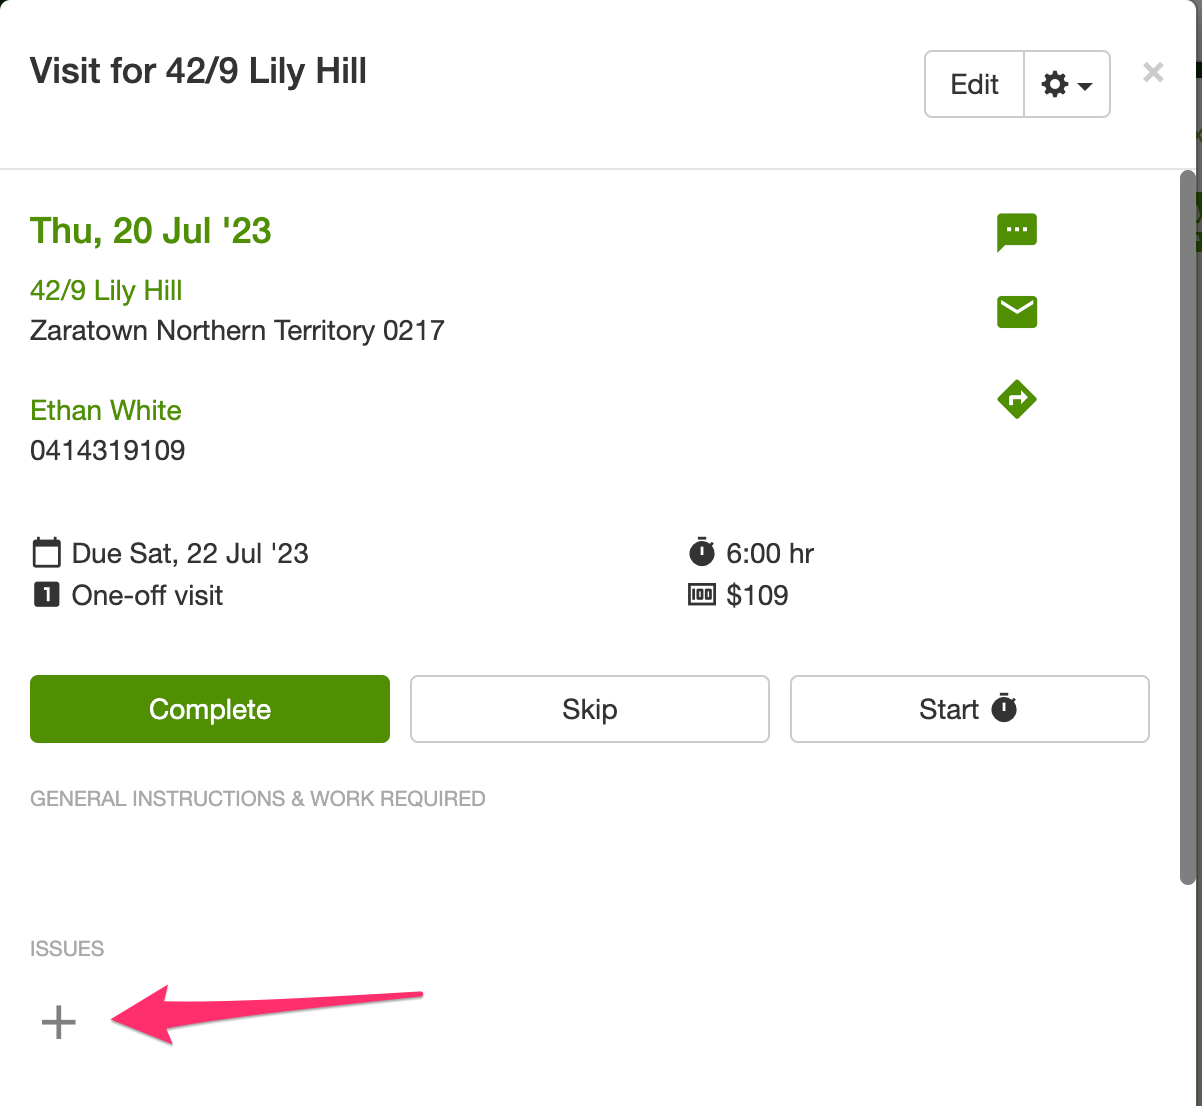
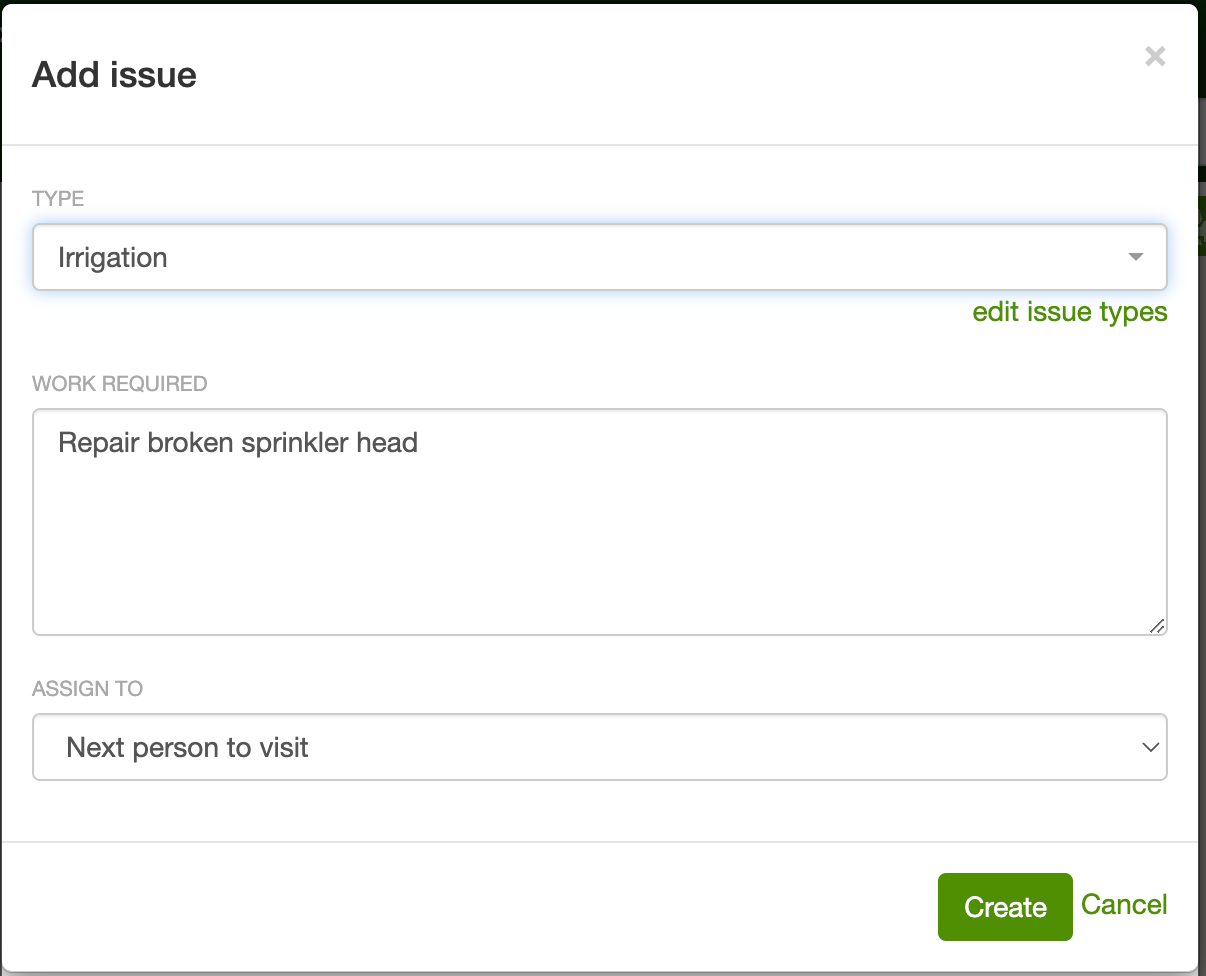
Complete the following fields and click the ‘create’ button:
- The issue type - For example ‘irrigation’, ‘fertiliser’, etc. You can also create your own custom issue types.
- Description - this is where you describe the work that needs to be done.
- (optional) Assign to - the employee who’s meant to do the work. This can be left blank if any employee is able to complete the issue.
Issues don’t have a due date
Section titled “Issues don’t have a due date”Issues stay open on the property until you mark them complete. There is no due date field.
If the work is for a later job (for example, apply fertiliser in four weeks), put the date at the start of the Description. For example: “28 Sep: apply fertiliser”.
The issue still shows on every job for that property until you mark it complete. The date at the front tells the crew it is not for this week. On the schedule you only see the issue type badge (such as GT), not the date. Open the job to read the description.
For work you do on a regular cycle, such as fertiliser every four weeks, use a second repeating job instead. See How to schedule recurring tasks like fertilizer applications alongside regular jobs.
Viewing issues
Section titled “Viewing issues”Once an issue has been created, it will appear as an open issue on the job dialog:
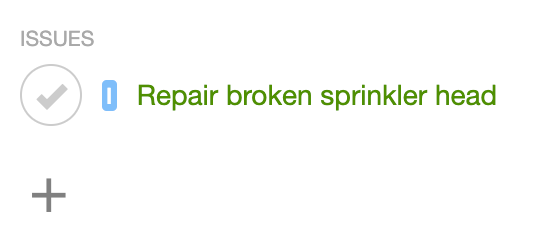
When viewing the job on the schedule, you’ll also see a small badge on the job letting you know there’s an open issue for that property. The badge displays the initials of the Issue Type (the first letter of each word) so employees can quickly identify outstanding tasks from the schedule view. Hover the badge to see the full type name.
For example:
- “General Task” displays as “GT”
- “Special Equipment” displays as “SE”
- “Irrigation” displays as “I”
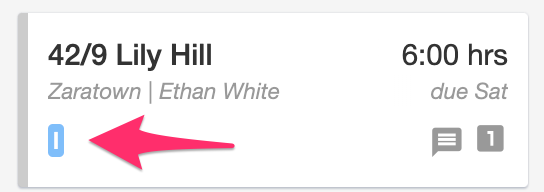
What does GT mean?
Section titled “What does GT mean?”GT stands for General task, SortScape’s built-in issue type. It is selected by default when you add an issue, and you cannot archive it.
Issue badges are on the day, week, and month schedule, in Detailed view. Calendar view blocks do not show them. Open the job and check Issues.
Only open issues show badges on schedule cards. Once you mark the issue complete, the badge no longer appears on future jobs for that property.
Converting an issue into a request
Section titled “Converting an issue into a request”Sometimes an issue is really a new piece of quotable work (mulch top-ups, extra weeding, a lawn renovation). Converting the issue into a request keeps the details and photos together, and it saves retyping.
To convert an issue into a request:
- Open the issue (from a job, or from the Issues list).
- Open Convert to and choose Request.
- The request form opens with the property and description filled in.
- Optional: leave Complete issue when request is created turned on if the issue is now handled by the request.
- If the issue has photos, they appear as selected tiles. Untick any you do not want copied onto the request.
- Save the request.
After conversion:
- The issue shows a link to the request, so you can jump into quoting later.
- The request shows that it was created from an issue, so the paper trail stays intact.
Photos on issues
Section titled “Photos on issues”Photos you attach to an issue stay on that issue. They also appear in All photos, together with job and property files.
Open Settings → Jobs → All photos. Set Source to Issues to see only those files. Each tile is labelled Issue. Click that label to open the issue.
Viewing all issues
Section titled “Viewing all issues”You can view all issues across all customers by clicking on the ‘Issues” tab in the top navigation bar. From this screen you can search, filter and export issues.

Marking issues complete
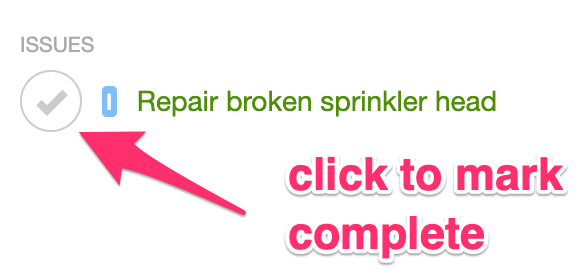
Section titled “Marking issues complete”You can mark the issue complete from anywhere you view the issue. For example, from the job dialog click the checkbox next to the open issue to mark it complete.
Completed issues on past jobs
Section titled “Completed issues on past jobs”When you mark an issue complete from a job, it stays visible on that job with a green tick. This is intentional: it shows which job the work was done on when you look back at your schedule history.
What you’ll see:
- On the job where you completed it: The issue stays listed with a green tick, even after it is resolved.
- On future jobs for the same property: The issue no longer appears, because it is no longer open.
If you open an older job and see completed issues with green ticks, that is normal. It is a record of work done on that day, not a sign that the issue is still outstanding.
Staying on top of issues
Section titled “Staying on top of issues”Users can be notified by email of any changes to issues assigned to them. This can help make sure that any open issues are managed to completion.
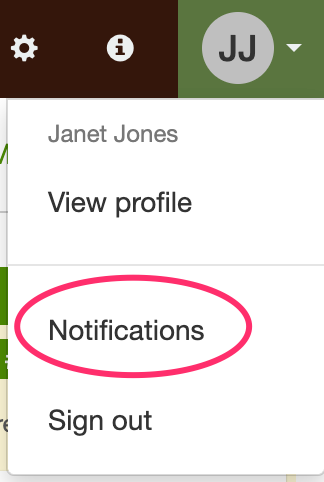
To be notified of issues assigned to you, click on your user profile dropdown and select “notifications”:
Enable the setting for “Email me about changes to issues assigned to me”
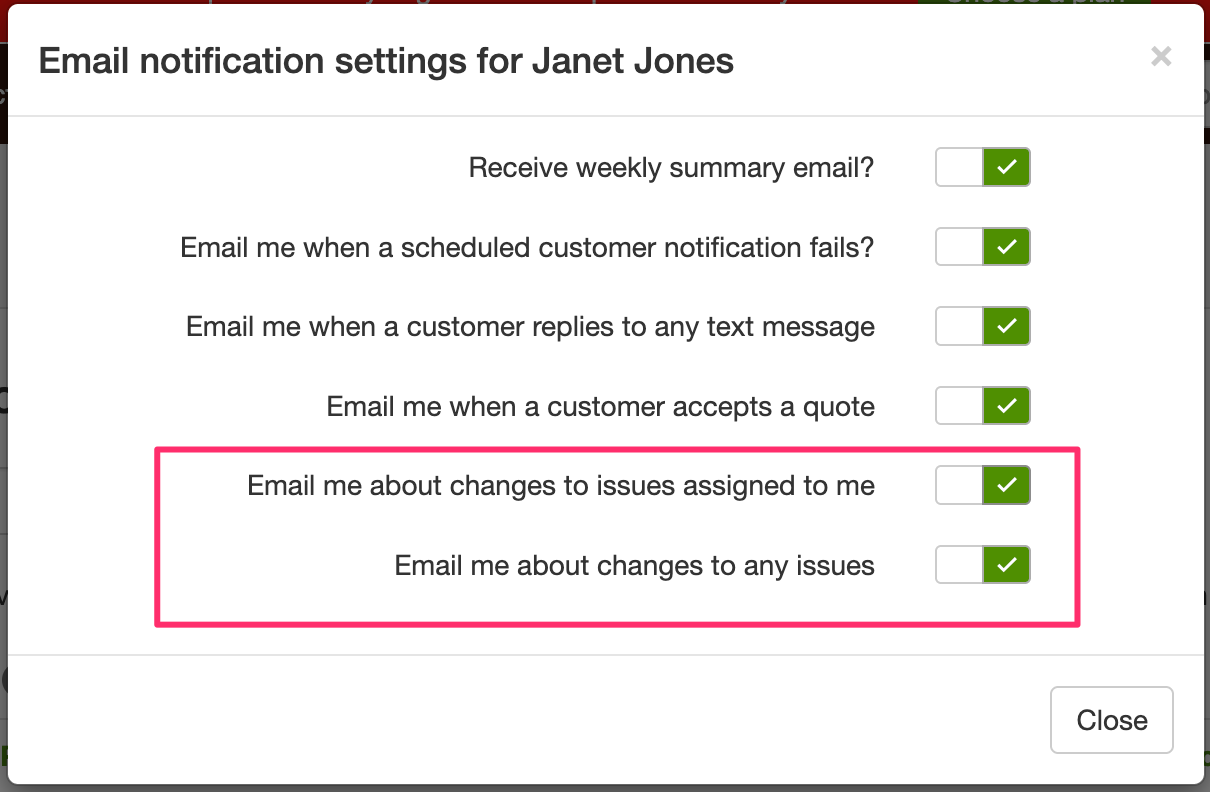
Administrators also have the option of enabling the setting for “Email me about changes to any issues” so they can ensure that ALL issues are managed to completion.
Notifications will be sent for the following actions:
- New issue created
- Issue updated
- Issue completed
- Issue reopened