

Job confirmations
Last updated:
Keep your day tidy: flag jobs that need a customer OK, and lock in the ones that are confirmed.
Why can’t I see job confirmations?
Section titled “Why can’t I see job confirmations?”Job confirmations are turned off by default until you enable them.
You will not see confirmation options on jobs or icons on the schedule until you:
- Turn on job confirmations. You need administrator access.
- Tick Requires customer confirmation on individual jobs you want to track.
Icons on the schedule only appear on jobs that require confirmation.
Turn on job confirmations for your account
Section titled “Turn on job confirmations for your account”- Open Settings → Jobs → Job settings.
- Turn on Enable job confirmations.
After this is on, edit or create a job and tick Requires customer confirmation to show status in the job form and on the schedule.
At a glance
Section titled “At a glance”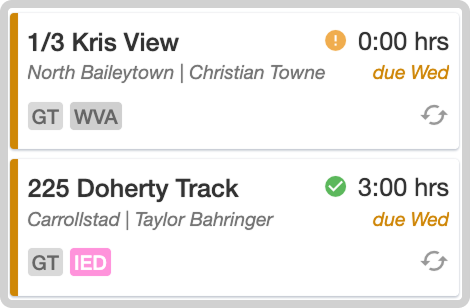
Orange warning on the Schedule = Needs confirmation.
Green tick = Confirmed by customer.
How to set the confirmation status
Section titled “How to set the confirmation status”When creating or editing a job, you will find the options in the confirmation status section. The “requires customer confirmation” option needs to be ticked for the status to show up in the job modal and on the schedule.

Once the “requires customer confirmation” is enabled for a job, you will get an extra section the job modal which allows you to toggle the confirmation status.

Moving a confirmed job
Section titled “Moving a confirmed job”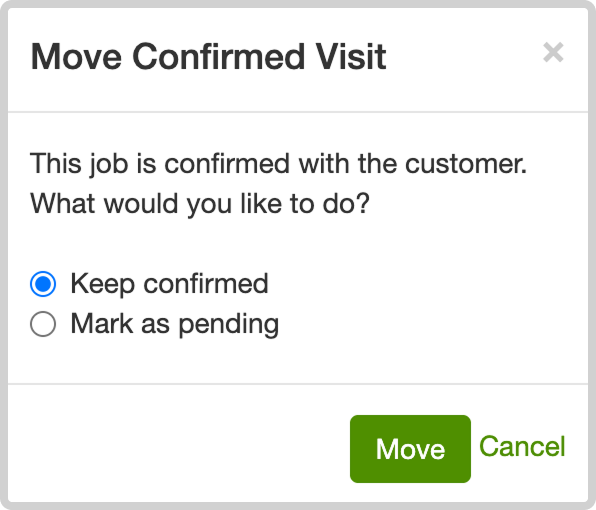
Dragging a confirmed job to a different run shows a warning. This prevents accidentally moving a confirmed job. Choose:
- Keep confirmed - keeps the job as confirmed
- Mark as pending - it returns to “not confirmed”
Quick tips
Section titled “Quick tips”Use confirmations for first‑time or rescheduled work, access‑dependent jobs (gates, pets, alarms), and anything that must be customer‑approved.
Add any access notes in General instructions & work required so crews aren’t guessing.